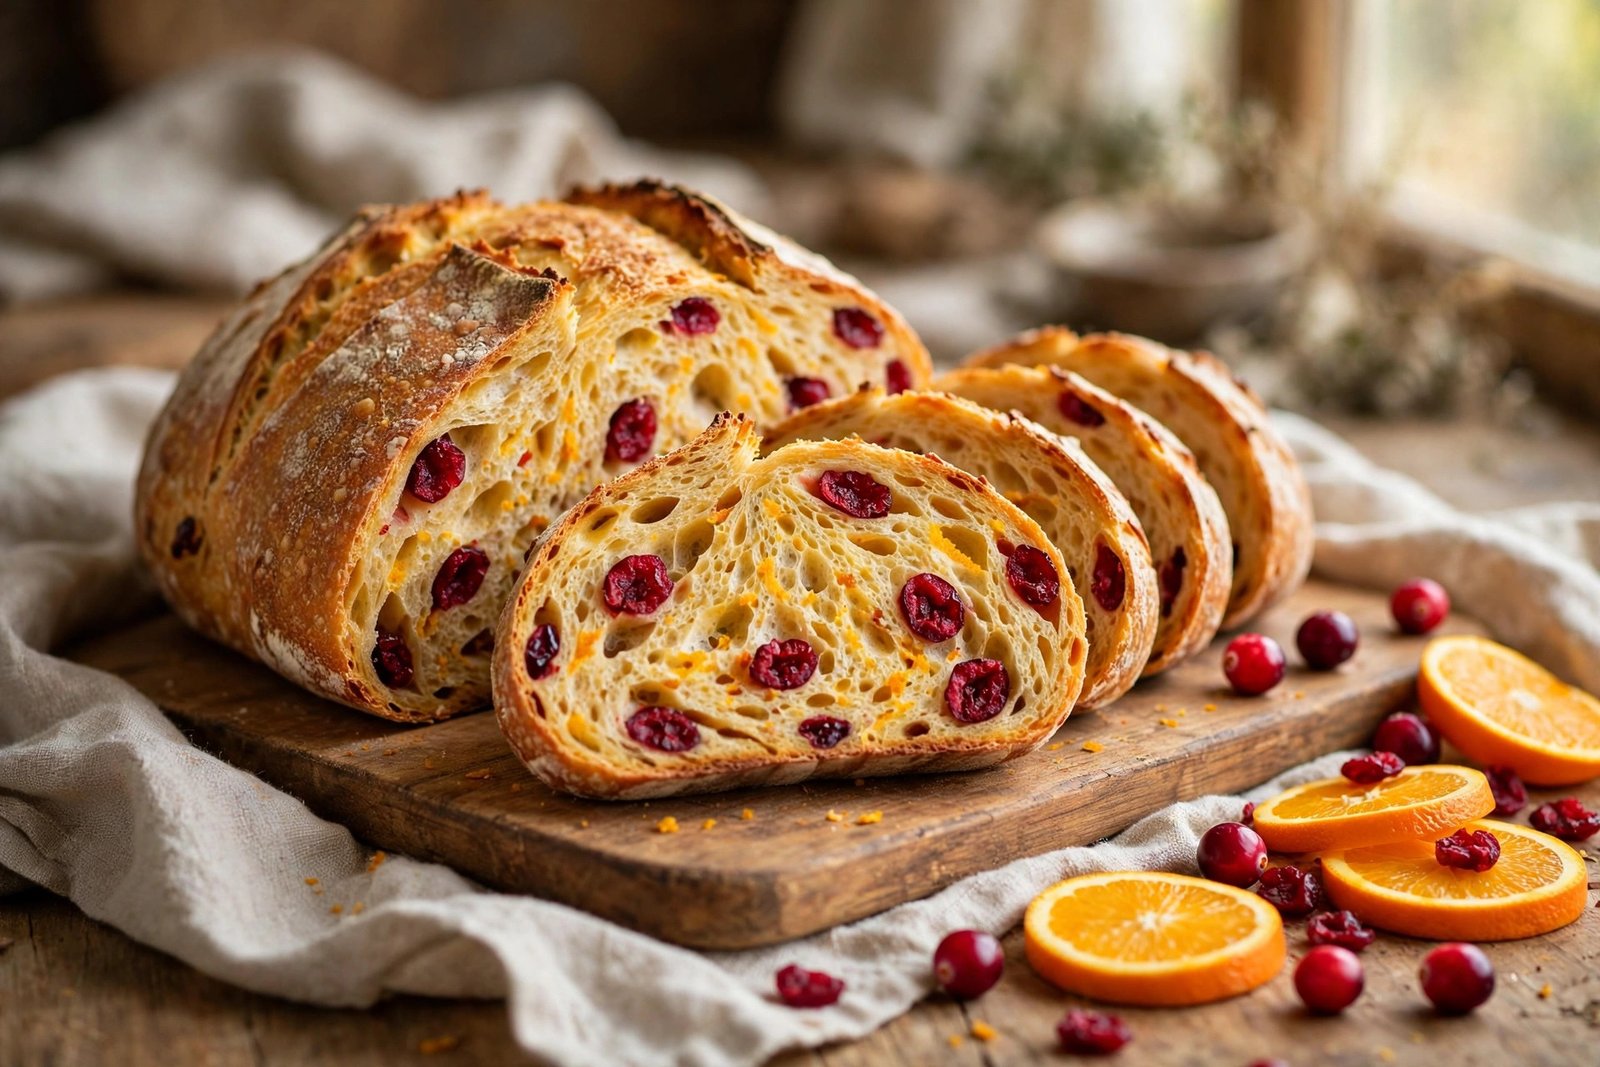
There’s a particular smell that tells you a loaf worked before you even cut into it. It’s not just bread. It’s warm crust and caramelised sugars and something bright — orange zest hitting hot air — and you know, standing there with oven mitts on, that the inside is going to be good.
This cranberry orange sourdough bread recipe is the loaf that made my kitchen smell like a bakery in December, except I bake it all year now. Tart dried cranberries tucked into a chewy, open crumb. Orange zest folded through the dough so every bite has a little citrus lift. A crackly, blistered crust that shatters when you press it, and a soft, custardy middle that stays fresh for days.
It’s a real sourdough, not a quick bread pretending to be one. That means an overnight rise, a living starter, and a little patience. But here’s the thing nobody tells you about sourdough: most of the time is waiting. Your hands are only busy for about half an hour, spread across an afternoon. The dough does the rest while you get on with your day.
If you’ve baked sourdough before, this is a gentle next step — one new skill (folding in fruit) on top of a loaf you already know how to make. If you haven’t, and your starter is sitting in the fridge wondering what it’s for, this is a good first loaf. The cranberries and orange forgive a lot. Even a slightly flat loaf tastes wonderful toasted with butter.
⚡ Quick Answer: Mix 500 g (about 4 cups) of bread flour with 375 g (1½ cups + 1 tablespoon) of lukewarm water and let it rest for 45 minutes. Stir in 100 g (½ cup) of active sourdough starter, rest 30 minutes, then add 10 g (2 teaspoons) of fine sea salt. Fold in 150 g (1 cup) of dried cranberries and the zest of 2 large oranges during the stretch-and-folds. Let the dough rise for 4–6 hours at around 75°F (24°C) until it has grown by half and feels puffy. Shape it into a round, tuck it into a floured banneton, and chill it in the fridge overnight, 12–16 hours. Next morning, bake it in a preheated Dutch oven at 450°F (230°C) — 20 minutes with the lid on, then 20–25 minutes with it off — until the crust is deep golden and the centre reads 205–210°F (96–99°C). Cool for at least 2 hours before slicing.
TL;DR – Recipe at a Glance
- Prep time: 30 minutes of hands-on work, spread across an afternoon
- Rise time: 4–6 hours bulk ferment, then 12–16 hours cold proof in the fridge
- Bake time: 40–45 minutes in a Dutch oven
- Cool time: 2 hours (don’t skip this — the crumb is still setting)
- Total time: About 24 hours, most of it waiting
- Yield: 1 large loaf, about 12 slices
- Difficulty: Intermediate — easier than it sounds, and the fruit hides small mistakes
- Best for: Holiday breakfasts, toast, sandwiches, gifting, and eating warm with salted butter
- Equipment: Dutch oven (or heavy lidded pot), banneton or lined bowl, kitchen scale, parchment paper
Why You’ll Love This Bread
- The flavour balance is the whole point. Tart cranberries, bright orange, and that gentle sourdough tang. None of them shouts. They take turns.
- The crust is genuinely crackly. A Dutch oven traps steam, and steam is what gives you that blistered, shattering crust you’d pay $9 for at a bakery.
- It stays fresh for days. Sourdough’s slow ferment means this loaf is still soft on day three, and it toasts beautifully on day four.
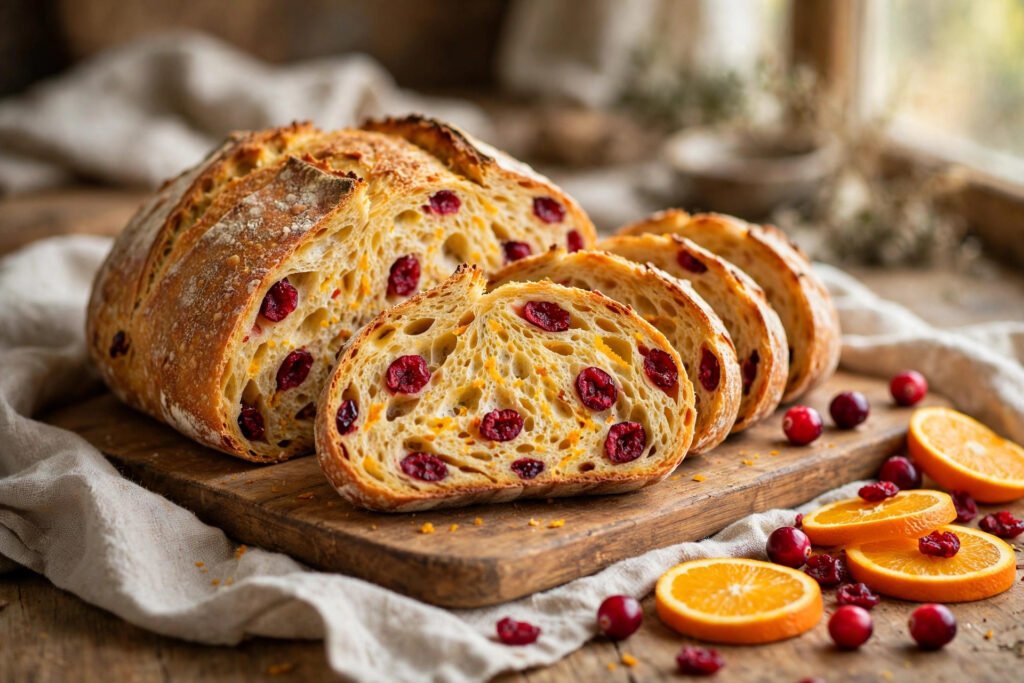
- It looks like you tried much harder than you did. Slice it open and the ruby cranberries against the pale gold crumb do all the showing off for you.
- One loaf, a dozen uses. Toast for breakfast, sandwiches at lunch, bread pudding with the stale end, croutons from whatever’s left.
- The house smells incredible. Orange zest in a hot oven is one of the best smells a kitchen can make. Full stop.
Recipe Card
| Prep | 30 minutes hands-on |
| Bulk ferment | 4–6 hours |
| Cold proof | 12–16 hours (overnight) |
| Bake | 40–45 minutes |
| Cool | 2 hours |
| Total | About 24 hours |
| Yield | 1 loaf (about 12 slices) |
| Calories | About 190 per slice |
Overview
| Flour | 500 g bread flour |
| Water | 375 g (75% hydration) |
| Starter | 100 g active, bubbly |
| Salt | 10 g fine sea salt |
| Cranberries | 150 g dried |
| Orange zest | Zest of 2 large oranges |
| Honey | 1 tablespoon (optional) |
| Oven | 450°F (230°C), Dutch oven |
Ingredients
- 500 g bread flour (about 4 cups, spooned and levelled) — Bread flour’s extra protein gives the chew and the open crumb. All-purpose works in a pinch, but the loaf will be a little softer and less tall.
- 375 g lukewarm water (1½ cups + 1 tablespoon, about 80°F / 27°C) — Weigh it. Cups lie, scales don’t, and hydration is the difference between a loaf and a brick.
- 100 g active sourdough starter (½ cup, fed 4–8 hours earlier) — It should have doubled and be full of bubbles. If it hasn’t peaked yet, wait. An underfed starter is the number one reason loaves come out flat.
- 10 g fine sea salt (2 teaspoons) — Salt slows the ferment just enough to build flavour, and it tightens the gluten. Don’t skip it, and don’t add it too early.
- 150 g dried cranberries (1 cup) — Sweetened dried cranberries are the easy choice and they hold up in the oven. Unsweetened are sharper; if you use them, add the tablespoon of honey.
- Zest of 2 large oranges (about 2 tablespoons) — Zest only, no white pith. The pith is bitter, the zest is where all the perfume lives. A microplane takes about a minute per orange.
- 1 tablespoon honey (optional) — Rounds out the tartness. Leave it out if your cranberries are already sweetened and you like a sharper loaf.
- Rice flour or extra bread flour, for dusting — Rice flour is the baker’s trick for a banneton: it doesn’t absorb moisture, so the dough releases cleanly.
Equipment
- Kitchen scale — Non-negotiable for sourdough. Every measurement in this recipe is by weight for a reason.
- Large mixing bowl — Big enough for the dough to double without climbing out.
- Dutch oven (4–6 quart) with a lid — The steam chamber that makes the crust. A heavy lidded pot works too.
- Banneton (or a bowl lined with a floured tea towel) — Gives the loaf its round shape during the cold proof.
- Parchment paper — For lowering the loaf into the hot pot without burning your hands.
- Sharp knife, razor blade, or lame — For scoring the top so the loaf opens up where you want it to.
- Instant-read thermometer — The only honest way to know when bread is done.
- Tea towel and plastic wrap or a shower cap — For covering the dough while it rises.
Quick Instructions
- Mix flour and water. Rest 45 minutes.
- Stir in the starter. Rest 30 minutes.
- Add salt and a splash of water. Mix until it disappears.
- Stretch and fold every 30 minutes, 4 rounds. Fold the cranberries and orange zest in during rounds 2 and 3.
- Let the dough rise 4–6 hours until puffy and about 50% bigger.
- Shape into a tight round. Rest 20 minutes, then shape again.
- Place seam-up in a floured banneton. Cover and refrigerate 12–16 hours.
- Heat the oven to 450°F (230°C) with the Dutch oven inside for 45 minutes.
- Turn the loaf onto parchment, score the top, and lower it into the pot.
- Bake 20 minutes with the lid on, 20–25 minutes with it off, until deep golden.
- Cool on a rack for at least 2 hours before slicing. Yes, really. Two hours.
Why Cranberry and Orange Belong in Sourdough
Some flavour pairings are just tradition. Cranberry and orange is one of them — the sauce on the Thanksgiving table, the muffins in the bakery case, the scones at the coffee shop. But in bread, the pairing does something different. It stops being a holiday cliché and starts being a balance act.
Think about what sourdough brings on its own. It’s tangy, a little earthy, deeply savoury in a way that white sandwich bread never is. On its own it’s wonderful, but it’s a one-note kind of wonderful — rich, warm, brown-flavoured. The cranberries cut through that. They’re tart and chewy and they pop against the soft crumb, so every few bites you get a little burst of sharpness that wakes your mouth up. And the orange zest sits above both of them, bright and floral, the way a squeeze of lemon lifts a rich sauce.
That’s the trick. Three flavours, three different jobs. The bread gives depth, the cranberries give contrast, the orange gives lift. Take any one of them away and the loaf is still fine. Together, it’s the kind of bread people ask about.
There’s also a practical reason this combination works so well in a long-fermented dough. Dried cranberries are sturdy. They don’t leak juice into the dough the way fresh berries do, they don’t dissolve, and they don’t turn the crumb pink. They stay exactly where you folded them, plump little rubies in a pale crumb. Fresh cranberries can work — and there’s a variation below if you want to try them — but dried ones are forgiving, which is what you want when you’re already managing a living dough.
And orange zest is almost unfairly powerful. Two oranges’ worth of zest perfumes an entire 500-gram loaf. The oils in the zest are fat-soluble, so as the butter melts… well, there’s no butter in this dough. But the oils still spread through the crumb during the long ferment, which is why the loaf smells like orange before you even cut it. You don’t need juice. Juice would make the dough sticky and the flavour would bake off. Zest is the whole move.
The Ingredients, Up Close
Bread Flour
Not all flour is equal here, and this is the one place where the choice genuinely matters. Bread flour runs about 12–14% protein. All-purpose sits around 10–12%. That gap sounds small, but protein is what forms gluten, and gluten is what traps the gas your starter produces. More gluten means a taller loaf with a more open crumb — those irregular holes that make sourdough look like sourdough instead of sandwich bread.
If all you have is all-purpose, use it. Drop the water to 350 grams, because all-purpose absorbs less, and accept a slightly softer loaf. It’ll still taste great. But if you’re buying flour for this recipe, buy bread flour. King Arthur, Bob’s Red Mill, whatever your store carries — the brand matters far less than the protein number on the bag.
One more thing: don’t use self-rising flour. It has baking powder and salt already mixed in, and it will fight your starter instead of helping it. Plain bread flour. That’s it.
The Starter
Your starter is the engine of this loaf, and engines need to be warm and fed before a long drive. Feed it 4–8 hours before you mix the dough, with equal weights of flour and water — say, 30 grams of starter, 30 grams of flour, 30 grams of water. Then leave it somewhere warm, around 75–78°F (24–26°C), and watch for it to double.
How do you know it’s ready? Three signs, and you want all three. It has doubled in size (mark the level with a rubber band so you can see it). The surface is covered in bubbles, not just a few lonely ones. And it smells pleasantly tangy, like yoghurt, not like nail polish remover. That sharp acetone smell means it’s hungry — feed it again and wait another few hours.
The float test gets talked about a lot, and it’s fine as a backup: drop a spoonful of starter in a glass of water and see if it floats. But it’s not reliable on its own. A starter can be perfectly active and still sink if you knock the gas out of it while scooping. Trust the doubling and the bubbles more than the float.
If your starter lives in the fridge — and most do — pull it out the night before, feed it, and let it wake up on the counter. A cold, sleepy starter mixed straight into dough will ferment so slowly you’ll be waiting until tomorrow night. Give it a warm-up feed and it will pay you back.
Dried Cranberries
Buy the plump ones. If the bag has been open in your cupboard since last Christmas and the berries feel like little pebbles, soak them in warm water for 15 minutes, then drain them well and pat them dry. Dry, hard cranberries steal moisture from the dough and stay hard in the finished loaf. Plump ones soften in the oven and stay chewy.
Sweetened vs unsweetened is a real choice, not a snob question. Sweetened cranberries — the standard Craisins-style ones — balance the sourdough’s tang and make the loaf friendly for breakfast. Unsweetened are bracingly tart, and some people love that edge. If you go unsweetened, add the tablespoon of honey. If you go sweetened, the honey is optional. Taste a berry before you decide.
And here’s a small thing that makes a big difference: toss the cranberries and the orange zest together in a little bowl before folding them in. The zest coats the berries, the berries stop clumping, and they distribute through the dough instead of landing in one sad cluster at the bottom.
Orange Zest
Two large oranges, or three small ones. You want about 2 tablespoons of zest, and you want it fine — a microplane is the right tool, not a vegetable peeler. Wash the oranges first, even if they’re organic. Then zest only the orange part. The moment you see white, stop and move to a new patch. That white pith is bitter enough to ruin a slice, and it doesn’t mellow in the oven.
Don’t zest the oranges the night before and leave the zest sitting out. The aromatic oils evaporate fast. Zest them while the dough is resting and fold the zest in within the hour. The smell alone is worth timing it right.
Salt and Water
Salt does more than season. In sourdough it tightens the gluten network and slows the yeast down just enough that flavour has time to develop. That’s why it goes in after the starter has had its 30-minute head start, not at the very beginning. Ten grams is 2% of the flour weight — the standard baker’s ratio — and it’s the amount that makes the bread taste like bread instead of like sweet dough.
Water temperature matters more than people think. If your kitchen is cold, use water at 85°F (29°C). If it’s a warm summer afternoon, use 70°F (21°C). You’re aiming for a dough temperature around 76–78°F (24–26°C) after mixing, because that’s the range where the ferment moves at a good pace — not sluggish, not racing. A cheap kitchen thermometer takes the guesswork out of it, and once you start checking dough temperature, you’ll wonder how you ever baked without it.
Your Starter, Your Schedule
Sourdough asks you to plan backwards from when you want bread, and that feels strange the first time. Here’s the timeline that works for most people, assuming you want warm bread for lunch or the afternoon:
The night before: Feed your starter before bed. It’ll peak while you sleep if your kitchen is cool, or a bit earlier if it’s warm.
Morning, 8:00 AM: Mix flour and water. While it rests, check your starter — doubled, bubbly, ready. Zest the oranges.
8:45 AM: Add the starter. Rest.
9:15 AM: Add the salt. First stretch and fold.
9:45 AM – 11:15 AM: Three more folds, 30 minutes apart. Cranberries and zest go in during folds two and three.
11:15 AM – 2:00 PM: Leave the dough alone. Let it rise until it’s grown by about half and jiggles like set jelly when you shake the bowl.
2:00 PM: Shape, rest, shape again. Into the banneton. Into the fridge.
Next morning, 8:00 AM: Oven on, Dutch oven inside, 45 minutes to heat. Score, bake, cool.
10:30 AM: Bread. Warm-ish, crackly, ready for butter.
If your kitchen is cold — say, below 68°F (20°C) — everything takes longer. The bulk ferment might stretch to 7 hours. That’s fine. Cold kitchens make better-tasting bread anyway, because a slow ferment builds more flavour. If your kitchen is hot, above 80°F (27°C), watch the dough, not the clock. It might be ready in 3½ hours. Dough doesn’t read recipes. It just ferments, faster when it’s warm, slower when it’s cold. Your job is to watch it, not the timer.
The Method, Step by Step
Step 1 – Mix the Flour and Water (Autolyse)
Put the flour in your big bowl. Pour in the water. Mix with your hand or a sturdy spoon until there’s no dry flour left — just a shaggy, rough mass. It won’t look like dough yet. It’ll look like a mistake. That’s normal.
Cover the bowl and walk away for 45 minutes. This rest is called an autolyse, and it’s doing quiet work: the flour is hydrating fully, the gluten is starting to form on its own, and the dough will be noticeably smoother and easier to handle when you come back. People skip this step. The people who skip it are the same people who wonder why their dough tears. Forty-five minutes, one bowl, no effort. Just do it.
Step 2 – Add the Starter
Dollop the 100 grams of active starter on top of the dough. Wet your hand — this keeps the dough from sticking to you — and squeeze and fold the starter in. Pinch, fold, turn the bowl, repeat. It’ll feel slippery and messy for a minute, and then suddenly it comes together into a single mass. That moment is satisfying every single time.
Cover and rest for 30 minutes. The starter is now waking up inside the dough, and the yeast and bacteria are starting their slow work.
Step 3 – Add the Salt
Sprinkle the salt over the dough, then add about a tablespoon of water — just enough to help the salt dissolve. Mix the same way: wet hand, pinch and fold, turn the bowl. Keep going until you can’t feel any gritty salt crystals. It takes about a minute.
Now the dough needs its first real rest. Cover it and set a timer for 30 minutes. This is when the gluten network starts to organise itself, and you’ll feel the difference at the next step: the dough will already be smoother and more elastic than it was.
Step 4 – Stretch and Fold, Round One
Wet your hand. Reach under one side of the dough, pull it up until it stretches — not tears, stretches — and fold it over to the other side. Turn the bowl a quarter turn and do it again. Four pulls, four sides, one full rotation. That’s a set.
Cover, rest 30 minutes. You’re going to do this three more times. Each set builds strength, and by the third one you’ll feel the dough resisting a little, holding its shape, springing back when you press it. That’s gluten doing its job.
Step 5 – Fold in the Cranberries and Orange Zest
During the second set of folds, sprinkle about half the cranberry-zest mixture over the dough before you fold. The folds will carry the fruit into the middle. During the third set, add the rest. Don’t dump it all in at once — a big clump of fruit in one spot makes the dough tear and the berries bunch up.
A note on patience: the fruit will try to poke out. Some berries will escape onto the counter. Push them back in gently. By the fourth set of folds, most of them will be tucked inside where they belong. The loaf doesn’t need to be perfectly even. A little variation is what makes each slice interesting.
Step 6 – The Bulk Ferment
This is the long, quiet part, and it’s the part that matters most. After the last fold, cover the bowl and leave the dough alone for the rest of the bulk ferment — usually another 2–3 hours after the folds, 4–6 hours total from when you added the starter.
What are you looking for? Not a clock reading. Look for the dough to have grown by about 50% — not doubled, half again. Look for bubbles on the surface and along the sides of the bowl. Press it gently: it should feel puffy and full of air, like a pillow. Shake the bowl: the whole mass should jiggle as one piece, like set jelly.
If you poke it and the dent springs back immediately, it needs more time. If the dent stays and the dough feels slack and deflated, you’ve gone too far — shape it right away and get it into the fridge. A slightly under-proofed loaf is better than a very over-proofed one. Under-proofed still springs in the oven. Over-proofed just… spreads.
Step 7 – Shape the Loaf
Turn the dough out onto a clean, lightly floured counter. Don’t flour it heavily — too much flour on the outside makes the dough slide around instead of gripping the counter, and grip is what builds tension.
Gently press the dough into a rough rectangle. Fold the bottom third up, the top third down, like a letter. Then fold the sides in. Flip it over so the seam is underneath, and cup your hands around it, pulling the dough towards you in little circles. The surface will tighten up. You’ll feel it — the top goes smooth and taut, like a drum skin. That’s surface tension, and it’s what holds the loaf up in the oven instead of letting it spread into a pancake.
Let it rest on the counter, seam down, for 20 minutes. This is the bench rest. The gluten relaxes a little, and the second shaping will be easier.
Then shape it again, same way, a little tighter this time. You want a round that holds its shape when you let go.
Step 8 – Into the Banneton and the Fridge
Dust your banneton generously with rice flour — it doesn’t absorb moisture the way wheat flour does, so the dough won’t stick. No banneton? Line a bowl with a clean tea towel and dust the towel.
Place the loaf seam-side UP in the banneton. (The seam becomes the bottom when you flip it out to bake, and the smooth top becomes the part you score.) Cover it with plastic wrap or a shower cap — you want it sealed so the surface doesn’t dry out and form a skin overnight.
Into the fridge for 12–16 hours. Overnight is perfect. This cold proof is doing two things at once: the yeast slows right down in the cold, so the loaf doesn’t over-proof, while the bacteria keep working slowly, building that tangy, complex sourdough flavour. A loaf that proofed overnight tastes noticeably better than one baked the same day. The fridge is not a delay. It’s an ingredient.
Step 9 – Preheat the Oven and Score
Next morning, put your Dutch oven — lid on — into the oven and heat it to 450°F (230°C). Give it a full 45 minutes. The pot needs to be screaming hot, because the moment the cold dough hits it, the heat is what creates the burst of steam that lifts the loaf.
While the oven heats, take the dough out of the fridge. Don’t let it warm up on the counter — cold dough scores cleaner and holds its shape better. Put a square of parchment on top of the banneton, put a cutting board or plate on top of that, and flip the whole thing over. Lift the banneton off. There’s your loaf, smooth side up.
Score it now. One confident slash, about a quarter inch deep, slightly off centre, running along the length of the loaf. A razor blade or a bread lame works best, but a very sharp serrated knife will do if you move fast and don’t saw. The cut gives the loaf a controlled place to expand — without it, the bread will burst open wherever it wants, usually at the bottom.
If you want a fancier look, add two or three shallow diagonal slashes. But one deep slash is the classic, and the classic works.
Step 10 – Bake
Careful now. Pull the oven rack out partway, take the lid off the Dutch oven, and use the parchment paper as a sling to lower the loaf into the pot. It’s hot. Move with purpose, not panic. Put the lid back on and slide the rack in.
Bake for 20 minutes with the lid on. The trapped steam keeps the crust soft while the loaf springs up — this is the oven spring, and it’s the most dramatic 20 minutes in bread baking.
Then take the lid off. The loaf will have grown, the score will have opened up, and the crust will be pale gold. Bake for another 20–25 minutes with the lid off, until the crust is a deep, burnished brown. Darker than you think. New bakers pull their bread too early because pale gold looks “done.” It isn’t. Sourdough crust should be the colour of a well-toasted marshmallow, with darker patches where the flour caramelised. That’s where the flavour lives.
If you have a thermometer, use it: the centre should read 205–210°F (96–99°C). If you don’t, knock on the bottom of the loaf. It should sound hollow, like knocking on a door.
Step 11 – Cool (The Hardest Step)
Take the loaf out of the pot and set it on a wire rack. Walk away for two hours. Minimum.
I know. The smell is doing things to you. The crust is crackling as it cools — you can actually hear it, little pops and snaps — and all you want is a slice. But the inside of the bread is still cooking. The starches are setting, the moisture is redistributing from the centre to the crust, and if you cut it now, the crumb will be gummy and wet, and the loaf will dry out faster tomorrow.
Two hours. Go for a walk. Make coffee. Set a timer and leave the kitchen if you have to. The bread will still be faintly warm when you cut it, and it’ll be worth it.
Dutch Oven vs Open Bake
| Dutch Oven | Open Bake (Baking Stone + Steam) | |
|---|---|---|
| Crust | Deep, blistered, crackly | Good, but usually paler and less blistered |
| Oven spring | Excellent — trapped steam does the work | Good if you add a tray of boiling water |
| Effort | Low — lid on, lid off, done | Higher — you manage steam yourself |
| Equipment | A pot with a lid | A stone or steel, plus a pan for water |
| Risk | Burning your hands on a hot pot | Steam burns when you open the oven door |
| Verdict | The easy, reliable choice | Works fine — just fussier |
If you don’t own a Dutch oven yet, don’t let that stop you. An open bake works: heat a baking stone or an upside-down baking sheet, put a deep tray on the oven floor, and when the loaf goes in, pour a cup of boiling water into the tray and shut the door fast. But if you bake bread more than twice a year, a Dutch oven is the single best purchase you can make. The one I use cost less than a month of bakery bread, and it’s baked a hundred loaves.
What Can Go Wrong (And How to Fix It)
| Problem | Likely Cause | The Fix |
|---|---|---|
| Loaf spread flat in the oven | Over-proofed, or shaping was too loose | Watch the dough, not the clock — shape when it’s grown ~50%, not doubled. Shape tighter next time, with more surface tension. |
| Dense, tight crumb with no holes | Under-proofed, or starter wasn’t active | Make sure the starter doubles before mixing. Give the bulk ferment more time — cold kitchens need longer. |
| Crust is pale and soft | Lid came off too early, or oven wasn’t hot enough | Bake longer with the lid off. Preheat the Dutch oven a full 45 minutes. Don’t fear a dark crust. |
| Bottom is burnt | Pot too hot, or rack too low | Move the rack up one notch. Put a baking sheet on the rack below the pot to deflect heat. |
| Big holes around the fruit, dense elsewhere | Cranberries clumped together | Toss the fruit with the zest first, and fold it in across two rounds instead of all at once. |
| Crumb is gummy or wet inside | Cut while still warm, or underbaked | Cool a full 2 hours. Check the centre hits 205–210°F (96–99°C) before taking it out. |
| Dough stuck to the banneton | Not enough dusting flour | Use rice flour in the banneton, not wheat flour. Dust generously — you can brush excess off after baking. |
| Loaf burst open at the side | Score too shallow, or no score at all | Score about a quarter inch deep, one confident cut. A shallow scratch won’t control the expansion. |
| Bread tastes too sour | Ferment ran too long or too warm | Shorten the bulk ferment, or use a cooler spot. A younger starter (fed 4 hours ago, not 12) gives a milder tang. |
| Cranberries all sank to the bottom | Dough was too wet, or fruit added too late | Add the fruit during the folds, not at shaping. A slightly lower hydration (350 g water) holds inclusions better. |
How to Tell It’s Done
The thermometer is the honest answer: 205–210°F (96–99°C) in the centre, measured with an instant-read probe pushed into the middle of the loaf. Below 200°F, the crumb is still wet inside, even if the crust looks perfect. Bread lies with its crust. It never lies with a thermometer.
Without a thermometer, use your senses. The crust should be deep golden brown — darker than sandwich bread, with some spots nearly mahogany. Tap the bottom of the loaf with your knuckles: it should sound hollow, like a drum, not dull and heavy. Pick it up: it should feel lighter than you expect for its size, because a good part of the water has baked out as steam.
And trust the smell. A finished loaf smells nutty and caramelised, not doughy. If you can still smell raw flour, give it five more minutes.
Variations Worth Trying
Once you’ve made the classic loaf, it becomes a base for experiments. Change one thing at a time so you know what worked.
Cranberry walnut. Add 100 grams of toasted, roughly chopped walnuts along with the cranberries. Toast them first — 8 minutes in a 350°F oven — or they’ll taste raw and soft in the finished bread. The bitterness of walnut against the tart cranberry is one of the great bread combinations.
Fresh cranberries. Swap the dried berries for 150 grams of fresh ones, halved. The loaf will be sharper and the crumb will pick up a faint pink blush around each berry. Drop the water by 25 grams, because fresh berries release juice in the oven. This is the version to make in November, when fresh cranberries are everywhere.
White chocolate and orange. Fold in 100 grams of chopped white chocolate with the cranberries. It melts into little sweet pockets and turns the loaf into something closer to a dessert bread. Wonderful toasted with nothing on it at all.
Rosemary and orange. Add a tablespoon of finely chopped fresh rosemary with the zest. The piney, savoury note against the citrus is unexpected and excellent — and it makes the loaf work for sandwiches in a way the plain version doesn’t quite.
Whole wheat swap. Replace 100 grams of the bread flour with whole wheat flour. The crumb will be a little denser and nuttier, and the ferment will move a touch faster because whole wheat feeds the yeast more. Add 15 grams of extra water to compensate.
Mini loaves. Divide the dough in half after the bulk ferment and shape two smaller rounds. Bake them in a smaller pot, or bake them side by side on a stone — just cut the bake time to about 35 minutes total. Two small loaves make a better gift than one big one. If you like sourdough in smaller, quicker formats, our Air Fryer Sourdough Pizza Toast turns the same tangy base into a lunch that’s ready in minutes.
Cranberry orange rolls. Use the same dough, but after the bulk ferment, divide it into 8 pieces, shape each into a ball, and bake them snug in a round cake pan. Twenty-five minutes at 425°F. Same flavours, pull-apart format, gone in an afternoon.
What to Eat It With
Toast is the obvious answer, and it’s the right one. Thick slices, properly toasted until the edges go crisp, with salted butter that melts into the crumb. The heat wakes the orange zest back up. If you only ever eat this bread one way, eat it like that, standing at the counter, still warm.
But it goes further. Cream cheese and a drizzle of honey, for breakfast. Turkey and brie, for a sandwich that tastes like a deli made it. A smear of goat cheese and a few slices of pear, if you’re feeling fancy. And the end pieces — the heels that nobody wants — make the best French toast you’ll ever have, because the sourdough tang balances the sweet custard in a way plain white bread can’t.
For the holidays, this is the loaf to put on the table next to the roast. Slice it thin, fan it out on a board, and watch it disappear before the main course arrives. It’s also the loaf to give away. Wrap it in parchment, tie it with string, and hand it to someone. Homemade bread is a gift that says more than a card does. And if your holiday table needs one more thing, our Small Batch Pumpkin Cinnamon Rolls Recipe bakes in the same spirit — small pan, big flavour, gone before the coffee’s cold. For dessert, our Mini Apple Cider Cheesecakes Recipe keeps the same autumn table going.
Storing It So It Stays Good
On the counter: Cut side down on a wooden board, or wrapped in a clean tea towel, the loaf stays good for 3–4 days. The crust will soften a bit — that’s normal, and a quick toast brings it right back.
What not to do: Don’t put it in the fridge. The fridge dries bread out faster than the counter does. Cold air pulls moisture out of the crumb, and you’ll end up with a loaf that’s stale by tomorrow. Room temperature, cut side down, tea towel over the top. That’s the whole system.
Freezing: This loaf freezes beautifully. Slice it first, then freeze the slices in a bag with parchment between them, or freeze the whole loaf double-wrapped in plastic and foil. It keeps for up to 3 months. To revive a frozen slice, toast it straight from frozen. To revive a whole frozen loaf, run it under the tap for a few seconds — yes, really — then bake it at 350°F for 10–12 minutes. It comes out crackly and warm, like it was baked that morning.
Stale bread: Don’t throw it away. Stale sourdough is an ingredient. Cube it for croutons (toss with olive oil, bake at 375°F for 15 minutes), blitz it into breadcrumbs, or turn it into a bread pudding. The cranberries and orange make the pudding taste like it was planned, not rescued.
Nutrition (Approximate, Per Slice)
| Per slice (1 of 12) | |
|---|---|
| Calories | About 190 |
| Carbohydrates | 38 g |
| Protein | 5 g |
| Fat | 1 g |
| Fibre | 2 g |
| Sugar | 6 g (mostly from the cranberries) |
| Sodium | 200 mg |
These are estimates for a loaf made with sweetened dried cranberries. Unsweetened cranberries drop the sugar to about 3 grams a slice. The slow ferment also does something interesting to the numbers: the bacteria in the starter break down some of the starches and the phytic acid in the flour, which is why many people find sourdough easier to digest than fast-risen bread. It’s not a health food — it’s bread — but it’s bread your gut notices the difference with.
Frequently Asked Questions
Can I make this cranberry orange sourdough bread recipe without a Dutch oven?
Yes. Bake it on a preheated baking stone or an upside-down baking sheet, with a deep tray on the oven floor. When the loaf goes in, pour a cup of boiling water into the tray and shut the door quickly. The steam won’t be as contained as in a Dutch oven, so the crust will be a little paler, but the bread will still be good. A heavy lidded pot — an enamelled cast iron casserole, a clay baker — works just as well as a named Dutch oven.
Do I need a banneton?
No. A bowl lined with a clean, well-floured tea towel does the same job. The banneton’s rings look pretty on the finished loaf, but the bread doesn’t care what shaped it. What matters is the flour: use rice flour for dusting, because it doesn’t absorb moisture and the dough releases cleanly. Wheat flour in a tea towel works, but it sticks more.
Can I use fresh cranberries instead of dried?
You can, and the result is sharper and prettier — the crumb picks up a faint pink blush around each berry. Halve the fresh cranberries first so they don’t burst unevenly, and drop the water in the dough by 25 grams, because fresh berries release juice as they bake. The loaf will be a little more moist inside, so check the temperature carefully before you call it done.
My starter hasn’t doubled in 8 hours. Is it dead?
Almost certainly not. Starters are hard to kill and easy to discourage. If your kitchen is cool — below 70°F (21°C) — everything is slower, including the starter. Move it somewhere warmer, like the top of the fridge or inside the oven with just the light on, and feed it again. If it smells like acetone, it’s hungry, not dead: feed it twice a day for two days and it’ll come back. The only starter that’s truly dead is one with pink or orange mould, or one that’s been left unfed for months and smells like a chemistry experiment gone wrong.
How long does the cold proof need to be?
At least 8 hours, and 12–16 is the sweet spot. You can push it to 24 hours if your schedule demands it — the flavour gets even better, though the loaf may be a little less springy. Past 36 hours, the dough starts to over-proof in the fridge and the yeast runs out of food, so don’t leave it in there for two days. Set a rough plan, not a prison sentence: mix in the morning, bake the next morning.
Why did my loaf come out flat?
Three usual suspects, in order. First, the starter wasn’t active enough — it needs to double and be full of bubbles before you mix. Second, the dough over-proofed — it grew past 50% and the gluten ran out of strength. Third, the shaping was too loose and the loaf had no surface tension to hold it up. Fix the starter first, because that’s the one that causes the most flat loaves.
Can I add the cranberries and zest at the beginning?
You can, but the dough will be harder to handle. Fruit gets in the way of gluten development, and orange zest’s oils can slow the ferment slightly if they’re mixed in too early. Adding them during the second and third folds gives the gluten a head start and distributes the fruit evenly. It’s a small thing, but it’s the difference between a loaf that holds its shape and one that slumps.
Is this bread very sweet?
No — and that’s deliberate. The cranberries bring sweetness, but the sourdough tang balances it, and there’s no added sugar beyond the berries themselves (plus an optional tablespoon of honey). It reads as a bread with fruit in it, not a cake. Toasted with butter, it tastes like breakfast bread. With cheese, it tastes like a cheese-board bread. It shifts depending on what you put on it, which is the mark of a good loaf.
How do I keep the crust crackly after baking?
Don’t wrap it in plastic while it’s warm, and don’t bag it until it’s completely cool — trapped steam softens the crust. Once it’s cool, keep it cut side down on a board with a tea towel over it. The crust will soften a little over a day or two no matter what you do, but a few minutes in a hot oven (350°F, 5 minutes) brings the crackle back.
Can I double this recipe?
Yes, easily. Double every ingredient and mix it in a very large bowl or a dough tub. The folds take a little longer because there’s more dough to move, and the bulk ferment may run 30 minutes faster because a larger mass holds warmth better. Divide it into two loaves after the bulk ferment and proof them in two bannetons. Two loaves, one afternoon of work.
Conclusion
This loaf is the one I make when I want the kitchen to smell like something is happening. Not because it’s hard — it isn’t, not really — but because it rewards the waiting. The starter does the slow work. The fridge does the flavour work. The oven does the drama. Your part is half an hour of folding and one brave slash with a blade.
The first time you pull it out of the pot, dark and blistered and smelling of orange, you’ll understand why people get hooked on sourdough. It’s not about the bread being perfect. It’s about the bread being yours — your starter, your timing, your kitchen’s temperature, your slightly uneven crumb with cranberries in unexpected places.
So feed your starter tonight. Mix the dough in the morning. And tomorrow, when you cut into a loaf that’s still faintly warm and the cranberries show ruby-red against the gold, put butter on the first slice and eat it standing at the counter. That’s how bread this good is supposed to be eaten.
Sources
- Wikipedia, “Sourdough” — history, microbiology and baking method of sourdough bread: https://en.wikipedia.org/wiki/Sourdough
- Wikipedia, “Cranberry” — cranberry varieties, cultivation and culinary uses: https://en.wikipedia.org/wiki/Cranberry
- Wikipedia, “Orange (fruit)” — orange zest, oils and culinary uses: https://en.wikipedia.org/wiki/Orange_(fruit)
- USDA FoodData Central, “Cranberries, dried, sweetened” — nutrition values for dried cranberries: https://fdc.nal.usda.gov/
- USDA FoodData Central, “Oranges, raw, navels” — nutrition values for oranges, including vitamin C: https://fdc.nal.usda.gov/
- King Arthur Baking, “Sourdough baking guides” — starter care, hydration and Dutch oven technique: https://www.kingarthurbaking.com/
- The Perfect Loaf, “Sourdough baking method” — bulk fermentation, shaping and cold proofing guidance: https://www.theperfectloaf.com/


2 thoughts on “Cranberry Orange Sourdough Bread Recipe”