Some desserts make you choose. Pecan pie or cheesecake? You stare at the dessert table, you weigh your options, and you end up taking a sliver of both because picking one feels wrong. These little cheesecakes end that debate for good. They put the two desserts in the same bite.
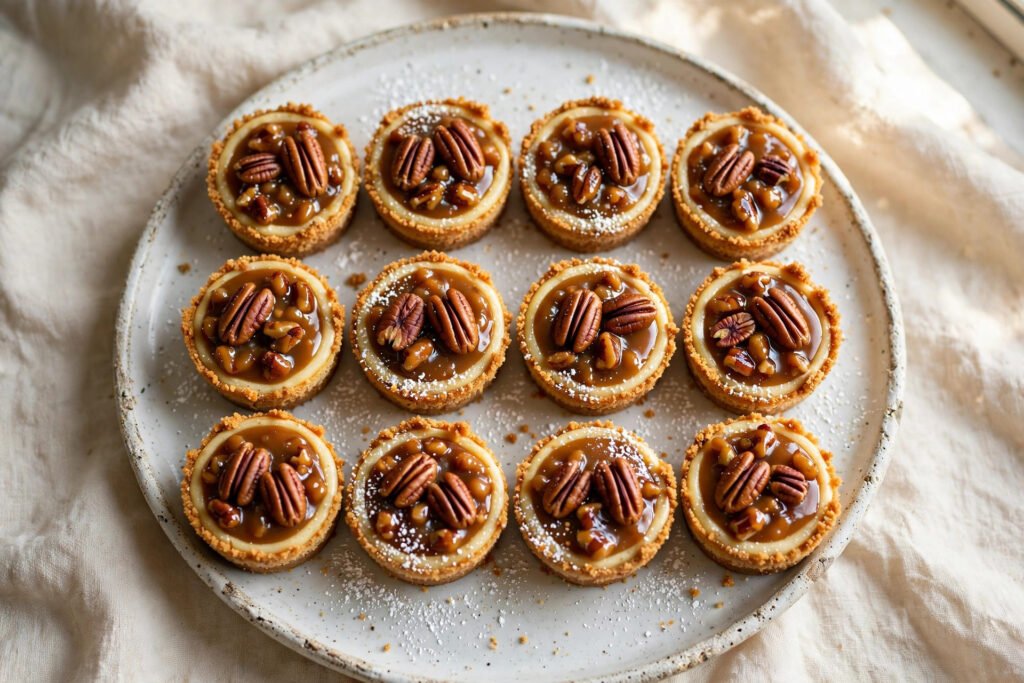
Each one is a single-serving cheesecake baked in a muffin tin. Buttery graham cracker crust on the bottom. A thick layer of creamy, tangy cheesecake in the middle. And on top, the part that makes people reach for a second one: a spoonful of warm, sticky pecan pie filling, all caramel and toasted pecans, with a whole pecan half sitting right in the center like it owns the place.
They look like they came from a bakery. They taste like Thanksgiving decided to dress up. And here’s the part nobody believes until they try it: they’re easier than a full-size cheesecake. No water bath. No springform pan. No worrying about a crack running across the top, because a crack on a two-inch cheesecake is barely a crack at all — and the pecan topping covers it anyway.
I make these every November now. The first year, I brought a dozen to a family dinner and they were gone before the coffee finished brewing. My uncle, who claims he doesn’t eat dessert, ate three. He stood at the counter and ate them one at a time like he was sampling them for quality control. There were no leftovers to control.
The whole thing takes about 25 minutes of hands-on work. The oven does the rest. They need a couple of hours in the fridge to set properly, so they’re a make-ahead dessert by nature — which is exactly what you want when the rest of the holiday meal is already chaos.
⚡ Quick Answer: Line a 12-cup muffin tin with paper liners. Mix 1½ cups graham cracker crumbs, ¼ cup sugar, and 6 tablespoons melted butter, and press about 2 tablespoons into each cup. Beat 16 oz softened cream cheese with ½ cup sugar, then add 2 eggs, ⅓ cup sour cream, 1 teaspoon vanilla, and 1 tablespoon flour. Fill each cup about ¾ full and bake at 325°F (163°C) for 18–20 minutes, until the centers jiggle just slightly. Cool, then chill at least 2 hours. For the topping, simmer ½ cup brown sugar, ¼ cup butter, 2 tablespoons heavy cream, and 1 tablespoon maple syrup for 2 minutes, stir in 1 cup chopped pecans and ½ teaspoon vanilla, and spoon over each chilled cheesecake. Top with a pecan half and serve cold or at room temperature.
TL;DR – Recipe at a Glance
- Prep time: 25 minutes — crush, mix, fill
- Bake time: 18–20 minutes at 325°F (163°C)
- Chill time: At least 2 hours (4 hours is better)
- Total time: About 2 hours 45 minutes, most of it hands-off
- Yield: 12 mini cheesecakes
- Calories: About 310 per cheesecake
- Difficulty: Easy — if you can use a hand mixer, you can make these
- Best for: Thanksgiving, Christmas, holiday parties, potlucks, and bake sales
- Equipment: Standard 12-cup muffin tin, paper liners, mixing bowls, hand mixer or stand mixer, small saucepan, measuring cups and spoons
Why You’ll Love These Mini Pecan Pie Cheesecakes
- Two desserts in one bite. Creamy, tangy cheesecake underneath. Gooey, caramelized pecan pie on top. Nobody has to choose.
- No water bath, no springform pan. A muffin tin does the whole job. If you’ve ever been scared off cheesecake by the equipment list, this is your way in.
- They’re portioned already. Twelve neat little desserts, no slicing, no serving spatula, no one getting the skinny piece. Perfect for a crowd.
- They travel well. Pop the tin’s worth into a container and they survive a car ride. Try that with a full cheesecake.
- Make-ahead friendly. They actually taste better the next day, once the flavors settle. Bake them tonight, top them tomorrow.
- They look expensive. That glossy pecan topping and the single pecan half on top make people assume you spent all afternoon on them. You didn’t.
The Recipe Card
Time and Yield
| Prep time | 25 minutes |
| Bake time | 18–20 minutes |
| Chill time | 2–4 hours |
| Total time | About 2 hours 45 minutes |
| Yield | 12 mini cheesecakes |
| Serving size | 1 mini cheesecake |
| Calories | About 310 per serving |
Recipe Overview
| Course | Dessert |
| Cuisine | American |
| Method | Baked in a muffin tin |
| Oven temperature | 325°F (163°C) |
| Pan | Standard 12-cup muffin tin with paper liners |
| Make-ahead | Yes — up to 2 days, topping added before serving |
| Freezer-friendly | Yes — cheesecake bases freeze up to 2 months |
| Dietary notes | Vegetarian; contains gluten, dairy, eggs, and tree nuts |
Ingredients
For the graham cracker crust:
- 1½ cups graham cracker crumbs — about 10 full graham cracker sheets, crushed fine
- ¼ cup granulated sugar — sweetens the crust and helps it set
- 6 tablespoons unsalted butter, melted — the glue that holds the crumbs together
- ¼ teaspoon fine salt — keeps the crust from tasting flat
For the cheesecake filling:
- 16 oz cream cheese (2 blocks), softened to room temperature — full-fat, not the tub kind
- ½ cup granulated sugar
- 2 large eggs, room temperature
- ⅓ cup sour cream — full-fat, for tang and creaminess
- 1 teaspoon vanilla extract — pure, not imitation, if you have it
- 1 tablespoon all-purpose flour — a small insurance policy against cracks
- ¼ teaspoon fine salt
For the pecan pie topping:
- ½ cup packed light brown sugar
- ¼ cup unsalted butter
- 2 tablespoons heavy cream
- 1 tablespoon pure maple syrup — or light corn syrup
- 1 cup pecans, roughly chopped
- ½ teaspoon vanilla extract
- Pinch of fine salt
- 12 pecan halves — for the tops
Equipment
- Standard 12-cup muffin tin
- Paper cupcake liners
- 2 mixing bowls (one medium, one large)
- Hand mixer or stand mixer
- Rubber spatula
- Small saucepan
- Measuring cups and spoons
- A flat-bottomed glass or measuring cup for pressing the crust
Quick Instructions
- Heat the oven to 325°F (163°C). Line a 12-cup muffin tin with paper liners.
- Stir the graham crumbs, sugar, salt, and melted butter together. Press about 2 tablespoons into each liner and pack it down flat.
- Beat the softened cream cheese and sugar until smooth, about 2 minutes. Add the eggs one at a time, then the sour cream, vanilla, flour, and salt. Mix just until combined.
- Divide the filling evenly among the cups, filling each about ¾ full.
- Bake 18–20 minutes, until the edges are set and the centers jiggle slightly when you nudge the pan.
- Cool in the pan for 30 minutes, then move to the fridge. Chill at least 2 hours.
- Simmer the brown sugar, butter, cream, and maple syrup for 2 minutes. Stir in the chopped pecans, vanilla, and salt.
- Spoon the warm topping over each cold cheesecake, add a pecan half on top, and serve.
Two Desserts Walked Into One Tin
Pecan pie and cheesecake come from completely different corners of American baking. Pecan pie is Southern, sticky, and loud about it — born in the early 1900s, when a corn syrup company printed a recipe for a “pecan pie” on the back of its cans and housewives across Texas and Georgia ran with it. The pecan itself is native to North America, the only major tree nut that grows wild here, and it had been a staple food for Indigenous peoples long before anyone thought to bake it into a pie. The classic version is almost absurdly simple: pecans, sugar, syrup, eggs, butter. It sets into something between a custard and a caramel, and it has been the Thanksgiving dessert that people argue about ever since.
Cheesecake took a different road. The modern version — dense, smooth, cream cheese-based — is a New York invention from the late 1800s and early 1900s, when dairy companies started selling cream cheese in foil-wrapped blocks and bakers figured out what it could do. Before that, cheesecake meant something else entirely: ricotta in Italy, quark in Germany, a honey-and-cheese cake in ancient Greece that athletes supposedly ate before the Olympics. The New York style won because it was rich in a way that felt like a special occasion. It also won because it was a pain to make, which somehow made it more desirable.
Putting them together isn’t a new idea, exactly. Bakeries have sold pecan-topped cheesecakes for decades. But the mini version — one cheesecake per muffin cup — changes the whole thing. A full pecan pie cheesecake needs a springform pan, a water bath, an overnight chill, and a steady hand. The mini version needs a muffin tin and about half an hour of your attention. Same flavors. A fraction of the stress.
That’s the real reason this recipe works. It isn’t a compromise. It’s the same dessert, cut down to the size where everything that makes cheesecake fussy stops mattering.
Picking Pecans That Actually Taste Like Something
The topping is the star here, so the pecans carry more weight than they do in most recipes. A bag of stale pecans will sink this dessert. Fresh ones will make people ask for the recipe.
Pecans go rancid faster than most nuts. They’re high in oil — about 70% fat by weight — and that oil turns bitter when it sits around in a warm cupboard. If your pecans have been in the pantry since last Christmas, smell them before you use them. Fresh pecans smell sweet and buttery. Stale ones smell like old paint, or like nothing at all, which is just as bad.
Buy pecan halves if you can. They’re usually fresher than pre-chopped pieces, because the nut’s surface area stays protected until you chop it. Chop them yourself with a knife — a rough chop, not a fine one. You want pieces big enough to bite into, about the size of a pea. The topping needs texture. If the pecans turn to dust, the topping turns to caramel sauce with grit in it.
A note on toasting: some recipes tell you to toast the pecans first. You don’t need to here. The topping simmers on the stove, and the pecans cook in that hot caramel for two minutes. They come out toasted and glossy. Save the extra step.
One more thing — the pecan halves on top aren’t just decoration. They tell people what they’re about to eat. A dessert with a pecan on top says “pecan pie” before anyone takes a bite. Use the prettiest halves you can find, and save the broken ones for the chop.
| Pecan form | Best for | Watch out for |
|---|---|---|
| Halves | Topping decoration, chopping yourself | Costs a little more, worth it |
| Pre-chopped pieces | The topping mix, if fresh | Check the smell — they go stale faster |
| Pecan meal/flour | Not for this recipe | Turns the topping gritty and dull |
| Candied pecans | A garnish, if you like extra sweetness | Too sweet with the caramel topping already there |
The Crust: Graham, Butter, and a Little Salt
A cheesecake crust has exactly one job: hold together under a soft filling and taste good doing it. Graham cracker crust does that job better than almost anything else, and it’s the crust this recipe uses.
The ratio matters more than the recipe. Too little butter and the crust crumbles when you peel the liner off. Too much and it turns greasy and slides around. Six tablespoons of butter to a cup and a half of crumbs is the sweet spot. The crumbs should look like wet sand when you squeeze a handful — it holds its shape, but it isn’t dripping.
Crush the crackers properly. A food processor does this in ten seconds, but a zip-top bag and a rolling pin work just as well, and honestly, the bag method is more fun. Aim for fine crumbs with a few slightly bigger bits mixed in. Dust-fine crumbs pack into a crust that’s hard as a brick. Chunky crumbs don’t hold together at all. You want mostly fine, with a little texture left.
The salt is not optional. A quarter teaspoon of salt in the crust sounds like nothing, but it wakes up the graham flavor and keeps the sweetness of the filling from running away with the whole dessert. Skip it and the crust tastes like sweet cardboard.
Press the crust down with something flat. The bottom of a measuring cup or a small glass works perfectly. Press firmly — you’re building a floor, not sprinkling crumbs. About two tablespoons per cup, pressed into an even layer. If the crust creeps up the sides a little, that’s fine. It looks rustic and it tastes the same.
Don’t pre-bake the crust. Some recipes call for it, but these cheesecakes bake at a low temperature for a short time, and the crust sets just fine in the oven alongside the filling. One less step, one less thing to watch.
Step-by-Step: Making Mini Pecan Pie Cheesecakes
Step 1: Get the Cream Cheese to Room Temperature
This is the step people skip, and it’s the step that decides whether your cheesecake is smooth or lumpy. Cold cream cheese doesn’t blend. It leaves little white flecks in the batter that no amount of beating will fix.
Take the blocks out of the fridge at least an hour before you start. An hour and a half is better. Cut each block into a few chunks so it warms faster. If you forgot — and everyone forgets sometimes — unwrap the blocks, set them on a plate, and microwave them in 10-second bursts until they’re soft but not melted. Melted cream cheese makes a runny batter. Soft cream cheese makes a smooth one.
The eggs and sour cream need the same treatment. Cold eggs in warm batter can make the mixture seize up and go lumpy. Set them on the counter when you set out the cream cheese. Room temperature ingredients mix into a batter that looks like silk. Cold ingredients mix into a batter that looks like cottage cheese.
Step 2: Line the Tin and Mix the Crust
Heat the oven to 325°F (163°C). Put paper liners in all twelve cups of a standard muffin tin. Don’t skip the liners. Without them, you’ll be chiseling cheesecakes out of the pan with a butter knife, and the crust will stay behind.
Stir the graham crumbs, sugar, and salt in a medium bowl. Pour in the melted butter and mix until every crumb looks damp. Drop about two tablespoons into each liner. Press it down flat with the bottom of a glass or a measuring cup. You’re aiming for a layer about a quarter inch thick — thin enough that it doesn’t overpower the filling, thick enough to hold together.
Set the tin aside while you make the filling. The crust doesn’t need to rest. It just needs to be there when the batter is ready.
Step 3: Beat the Cream Cheese and Sugar
Put the softened cream cheese in a large bowl. Beat it on medium speed for about a minute, until it’s completely smooth and fluffy. Scrape down the sides of the bowl. Beat it again for another 30 seconds. This is the moment that decides the texture of the whole dessert. If the cream cheese is smooth now, the cheesecake will be smooth later.
Add the sugar and beat for another minute or two. The mixture should look pale and creamy, with no graininess. If you can still feel sugar grit when you rub a little between your fingers, keep beating. Granulated sugar dissolves slowly in cream cheese, and undissolved sugar makes a gritty cheesecake.
Step 4: Add the Eggs, One at a Time
Crack in the first egg. Beat on low speed just until it disappears into the batter — about 20 seconds. Scrape down the sides. Add the second egg and do the same.
Low speed matters here. High speed whips air into the batter, and air is the enemy of a smooth cheesecake. Air bubbles expand in the oven, puff the cheesecakes up, and then collapse as they cool, leaving cracks and sunken centers. You want the eggs mixed in, not whipped in. Gentle wins.
Step 5: Finish the Batter
Add the sour cream, vanilla, flour, and salt. Beat on low for another 20–30 seconds, just until everything is combined and the batter looks uniform. Stop the mixer. Scrape the sides and the bottom of the bowl with a spatula and give it a few folds by hand.
That’s it. The batter should be thick, smooth, and pourable — like a very thick pancake batter. If you see lumps, beat for another 15 seconds on low. If you see air bubbles on the surface, tap the bowl firmly on the counter a few times. The bubbles rise and pop.
Don’t overmix. Once the flour is in, every extra minute of beating develops gluten and works air into the batter. Both of those make cracks. Mix until it’s combined, then stop.
Step 6: Fill the Cups and Bake
Divide the batter evenly among the twelve cups. A cookie scoop or a quarter-cup measure makes this easy — about three tablespoons per cup, filled about three-quarters full. The cheesecakes puff slightly as they bake, then settle back down. Don’t overfill, or they’ll mushroom over the liners.
Slide the tin into the center of the oven. Bake for 18–20 minutes. The edges should look set and slightly puffed. The centers should still jiggle when you gently shake the pan — a soft wobble, like gelatin, not a liquid slosh. That jiggle is the whole secret. The cheesecakes finish setting as they cool, and the residual heat does the last bit of work. If you wait until the centers look firm in the oven, they’ll be overbaked by the time they cool, and overbaked cheesecake is dry cheesecake.
Every oven runs a little hot or a little cool. Start checking at 17 minutes. If the edges are set and the centers wobble, they’re done.
Step 7: Cool, Then Chill
Turn off the oven. Leave the tin in the oven with the door cracked open for 10 minutes. This slow cool-down is the closest thing to a water bath these little cheesecakes need. A sudden temperature drop is what cracks cheesecake, and the cracked-open oven lets the temperature fall gently.
Move the tin to a wire rack and let the cheesecakes cool for another 20 minutes at room temperature. Then cover the tin loosely with plastic wrap or foil and move it to the fridge. Chill for at least 2 hours. Four hours is better. Overnight is best.
Chilling isn’t optional. Warm cheesecake is soft and won’t hold its shape when you peel the liner off. Cold cheesecake slices cleanly, holds its shape, and tastes better — the flavors need time to settle and the texture needs time to firm up. Patience here pays off directly in the first bite.
Step 8: Make the Pecan Pie Topping
About 30 minutes before serving, make the topping. Put the brown sugar, butter, heavy cream, and maple syrup in a small saucepan over medium heat. Stir as the butter melts. Bring it to a gentle simmer — small bubbles around the edges — and let it cook for 2 minutes, stirring now and then. The mixture will thicken slightly and turn a deep amber color.
Take it off the heat. Stir in the chopped pecans, vanilla, and salt. Let it sit for 2–3 minutes. It thickens as it cools, and you want it spoonable, not pourable. If it’s too runny, wait another minute. If it gets too thick, stir in a teaspoon of warm cream.
Spoon about a tablespoon and a half over each cold cheesecake. Spread it gently to the edges with the back of the spoon. Press a pecan half into the center of each one. Serve them cold, or let them sit at room temperature for 20 minutes first — the topping softens slightly and the cheesecake tastes creamier.
The Water Bath Question
Every cheesecake recipe eventually has to answer this question: do I need a water bath?
For a full-size cheesecake, the honest answer is usually yes, or at least “it helps a lot.” A water bath surrounds the pan with gentle, even heat and steam, and that keeps the top from cracking and the edges from overcooking.
For these mini cheesecakes, the answer is no. The small size changes the physics. A two-inch cheesecake heats evenly all the way through in 18 minutes. There isn’t enough surface area for a serious crack to form. The low oven temperature — 325°F instead of the usual 350°F — does the rest of the work. And the pecan topping covers whatever small imperfections do show up.
Skip the water bath. Skip the foil wrap around the pan, the roasting pan full of boiling water, the oven mitts dripping everywhere.
That’s the whole point of the mini version.
The Pecan Pie Topping: Where the Magic Happens
The topping is a simplified pecan pie filling, cooked on the stove instead of baked in a crust. Brown sugar, butter, cream, and maple syrup simmer into a caramel that’s thinner than the filling inside a pie — because it doesn’t have eggs to set it — and then the pecans go in.
Two minutes of simmering is the number to remember. Less than that, and the sugar doesn’t fully dissolve; the topping tastes grainy. More than three minutes, and the caramel starts to harden as it cools, turning chewy instead of spoonable. Set a timer. Two minutes, stirring now and then, then off the heat.
Maple syrup does two jobs here. It adds flavor — a warm, woodsy sweetness that plain corn syrup doesn’t have — and it keeps the caramel from crystallizing. If you only have corn syrup, use it. The topping will still be good. But maple syrup makes it taste like something a bakery would charge eight dollars for.
The heavy cream is what keeps the topping soft. Without it, brown sugar and butter cook into a hard caramel that cracks when you bite it. With it, the topping stays glossy and spoonable even after a night in the fridge. Don’t swap in milk. Milk has too much water and too little fat, and the topping turns thin and watery.
Spoon the topping on while it’s still warm but not hot. Warm topping spreads easily and settles into a smooth layer. Hot topping melts the top of the cheesecake underneath. Let it sit for two or three minutes off the heat, then spoon.
Troubleshooting: When Things Go Wrong
Cheesecake has a reputation for being fussy, but almost every problem has a simple cause and a simple fix. Here’s the short list of what goes wrong with this recipe, and what to do about it.
| Problem | Likely cause | Fix |
|---|---|---|
| Cracks on top | Oven too hot, or cooled too fast | Bake at 325°F, cool in the oven with the door cracked; the topping covers small cracks anyway |
| Sunken centers | Too much air beaten into the batter | Beat on low speed; add eggs one at a time and stop as soon as they’re mixed in |
| Lumpy filling | Cream cheese wasn’t at room temperature | Let blocks sit out 60–90 minutes; beat the cream cheese alone first until smooth |
| Soggy crust | Too much butter, or not pressed firmly | Stick to 6 tablespoons; press the crumbs down hard with a glass |
| Crust crumbles when peeled | Too little butter, or not chilled long enough | Use the full 6 tablespoons; chill at least 2 hours before peeling liners |
| Topping too runny | Didn’t simmer long enough | Simmer a full 2 minutes; let it sit 3 minutes off the heat to thicken |
| Topping too hard | Simmered too long, or too little cream | Keep the simmer to 2 minutes; add a teaspoon of warm cream to loosen it |
| Cheesecakes stick to liners | Peeled while still warm | Chill fully before peeling; use good-quality paper liners |
| Bland flavor | Forgot the salt, or used imitation vanilla | Don’t skip the salt in the crust and filling; use pure vanilla extract |
| Topping slides off | Spooned onto warm cheesecake | Chill the cheesecakes fully before topping; warm topping on cold cheesecake sticks |
Why These Crack Less Than a Full-Size Cheesecake
Cracks are the thing people fear most about cheesecake, and the fear is fair. A full-size cheesecake is a big, flat disk of custard. The edges cook faster than the center. The top dries out. As it cools, the whole thing contracts, and the surface splits. It’s physics, and it happens to professionals too.
Mini cheesecakes dodge most of that. The volume is tiny — about three tablespoons of batter per cup — so the heat reaches the center almost as fast as it reaches the edges. There’s no big temperature gradient to fight. The low oven temperature helps too. At 325°F, the batter heats gently instead of racing to set on the outside while the inside is still liquid.
The flour helps as well. One tablespoon sounds like nothing, but it gives the batter a little structure — a bit of starch that holds the proteins together as they set. It won’t make the cheesecake taste like cake. You won’t notice it at all. You’ll notice the absence of cracks.
And then there’s the topping. Even if a cheesecake does crack — and one out of twelve probably will, because baking is like that — a spoonful of pecan caramel hides it completely. Nobody will ever know. That’s not cheating. That’s good design.
Variations Worth Trying
The base recipe is solid, but it takes to changes well. Here are the ones I’ve actually made and would make again.
- Bourbon pecan topping. Stir a tablespoon of bourbon into the topping with the vanilla. The alcohol cooks off in the heat. What stays is a warm, oaky note that makes the caramel taste older and deeper. Leave it out if kids are eating them.
- Chocolate crust. Swap the graham crumbs for chocolate wafer crumbs or crushed chocolate sandwich cookies. The chocolate base with the caramel pecan topping tastes like a turtle candy in cheesecake form.
- Salted caramel drizzle. Drizzle a little extra caramel sauce over the finished cheesecakes and sprinkle a pinch of flaky sea salt on each one. The salt against the sweet topping is the best bite in the whole dessert.
- Pumpkin spice cheesecake. Add a teaspoon of pumpkin pie spice and two tablespoons of pumpkin purée to the batter. It turns the filling a soft orange color and tastes like the two best Thanksgiving desserts had a baby.
- Maple pecan. Replace the granulated sugar in the filling with maple sugar, and use maple syrup in the topping. The whole dessert leans into the maple, and it works beautifully with the pecans.
- Gluten-free crust. Use gluten-free graham-style crackers or crushed gluten-free gingersnaps. The rest of the recipe is already gluten-free except for the one tablespoon of flour — swap that for cornstarch and you’re set.
- Mini muffin tin version. Use a 24-cup mini muffin tin and halve the baking time to about 12 minutes. You get two dozen bite-size cheesecakes. They’re dangerously easy to eat. You’ve been warned.
What to Serve With Them
These cheesecakes don’t need much company. They’re rich, and a small plate with one cheesecake and a cup of coffee is a complete dessert. But if you’re building a holiday table, they play well with others.
Coffee is the obvious partner. The bitterness cuts through the caramel and the cream cheese tang. A dark roast works best. Tea works too — black tea, or a spiced chai if you want to lean into the fall flavors.
On a dessert table, they sit nicely next to lighter things. Fresh fruit. A bowl of whipped cream for people who want to add a dollop. Something tart, like a cranberry sauce or a lemon bar, gives the table balance. The cheesecakes are the rich, sweet anchor. Everything else can be lighter.
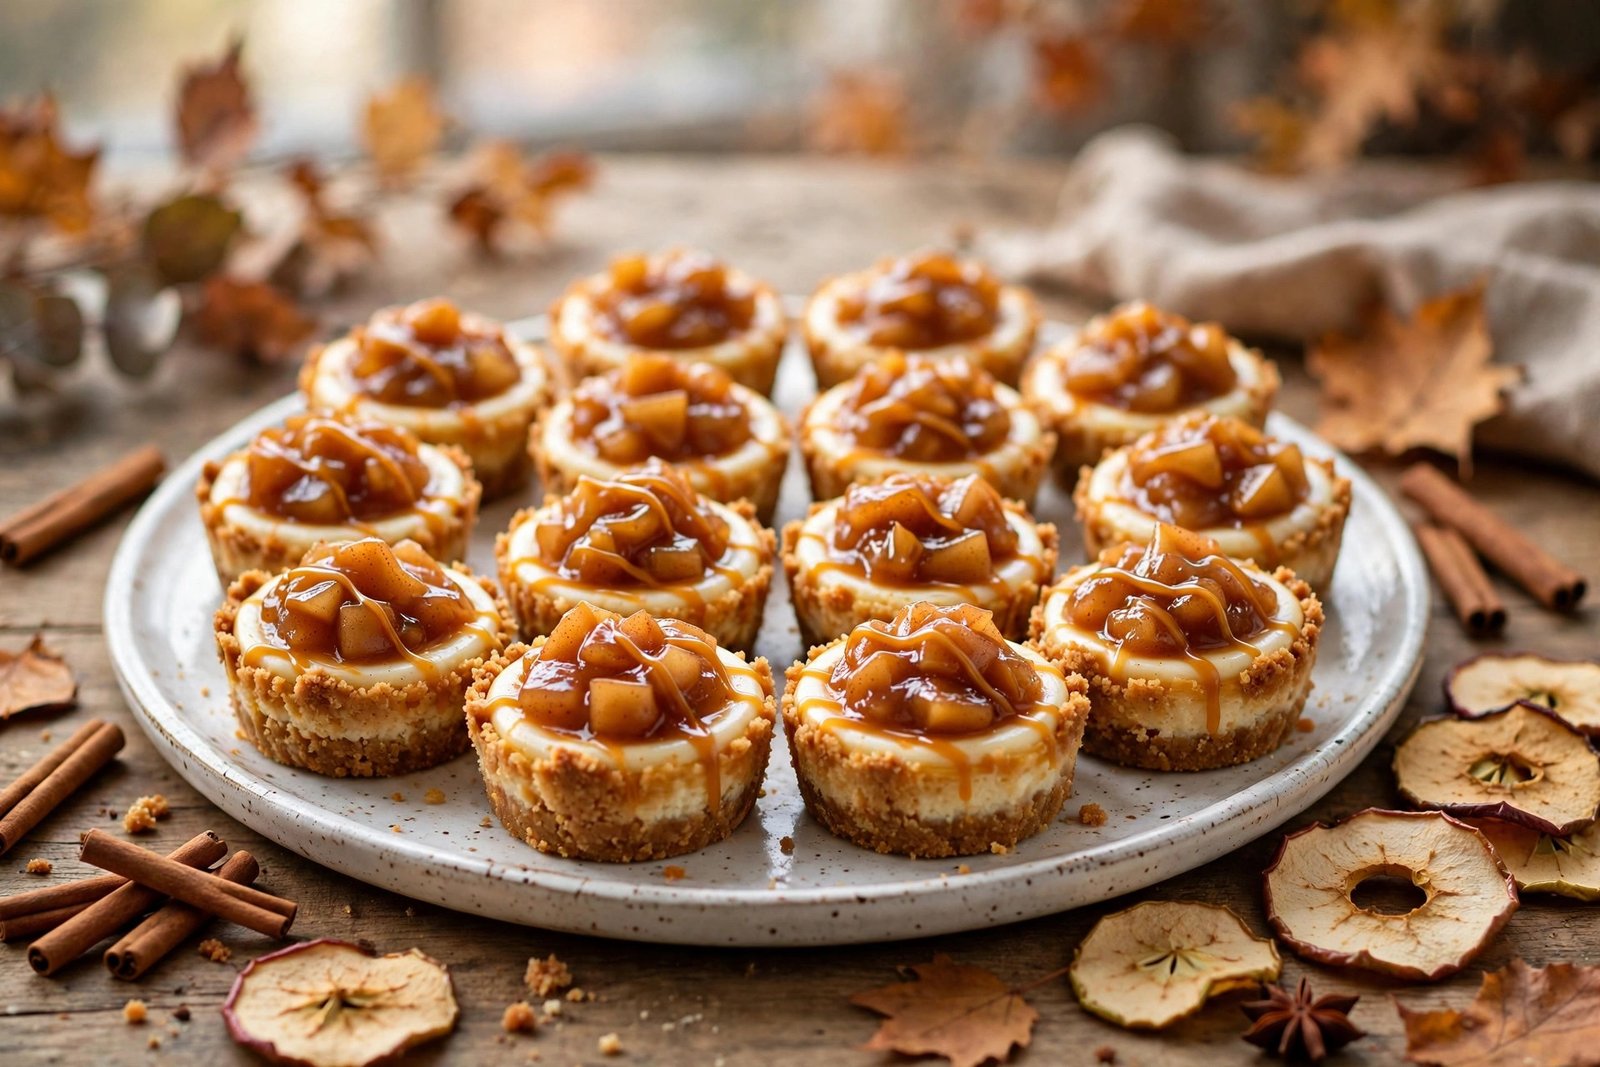
They also pair with the other fall desserts on this site. A plate with one of these and one of our mini apple cider cheesecakes makes a tidy little tasting. Add a small batch pumpkin cinnamon roll to the table and you’ve got the whole season covered. And if the meal needs a savory counterweight before dessert, the air fryer sweet potato cubes with cinnamon make a side dish that doubles as a warm-up act — same spice family, same crowd-pleasing energy.
Storage, Freezing, and Making Ahead
These are a make-ahead dessert by design, and they store better than most baked goods. The fridge is their friend.
| Situation | How long | How to store |
|---|---|---|
| In the fridge, topped | 3–4 days | Airtight container, single layer, or layers separated by parchment |
| In the fridge, untopped | Up to 5 days | Same container; add the topping just before serving |
| In the freezer, untopped | Up to 2 months | Freeze on a tray first, then wrap each one in plastic wrap and store in a freezer bag |
| In the freezer, topped | Not recommended | The topping gets sticky and weepy when thawed |
| At room temperature | Up to 2 hours | Fine for serving; don’t leave them out overnight |
| Thawing frozen cheesecakes | 4–6 hours in the fridge | Move from freezer to fridge the night before; add topping after thawing |
The freezer trick is the one that saves holidays. Make a double batch in early November. Freeze the untopped cheesecakes. The night before the party, move them to the fridge. An hour before serving, make the topping and spoon it on. Nobody will know they were frozen. The texture holds up perfectly because the fat content in the cream cheese protects it from ice crystals.
One thing to watch: don’t freeze them in the paper liners if you’re stacking them. The liners peel off fine after thawing, but if you stack them while frozen, the liners can stick to each other and tear. Freeze them on a tray in a single layer, then bag them once they’re solid.
Scaling the Recipe Up or Down
The recipe makes twelve, which is one standard muffin tin. That’s the natural batch size, and I’d keep it there unless you have a reason to change it.
A half batch works fine — six cheesecakes, same bake time, same temperature. Use the same muffin tin, just fill six cups and put a little water in the empty cups to keep the tin from warping. A double batch needs two tins, or two rounds in the oven. Don’t try to cram twenty-four into one tin by overfilling. Overfilled cheesecakes puff up, spill over, and bake unevenly.
If you’re making these for a crowd, two batches is the honest answer. Each batch takes about 25 minutes of work. Two batches is 50 minutes. That’s still less time than one full-size cheesecake with a water bath.
Mini vs. Full-Size: A Side-by-Side Look
If you’re wondering whether to make these or a whole pecan pie cheesecake, here’s how they stack up.
| Mini cheesecakes | Full-size cheesecake | |
|---|---|---|
| Bake time | 18–20 minutes | 55–70 minutes |
| Chill time | 2–4 hours | 6 hours to overnight |
| Water bath | Not needed | Recommended |
| Equipment | Muffin tin | Springform pan, roasting pan |
| Crack risk | Low | Medium to high |
| Serving | Already portioned | Needs slicing |
| Travel | Easy, in a container | Risky |
| Best for | Parties, potlucks, bake sales | A sit-down dinner, one big centerpiece |
The full-size version has one advantage: it looks impressive on a table, sliced open, with the topping spread across the top. The minis win on everything else.
Nutrition: What’s Actually in One Mini Cheesecake
A mini cheesecake is a dessert. It’s not health food, and pretending otherwise would be silly. But the portion size does the work for you. One of these is about 310 calories, and that’s a satisfying dessert — not a slab you feel guilty about.
The pecans are the nutritional bright spot. They’re one of the most nutrient-dense nuts out there: rich in monounsaturated fats, the same kind of fat that’s in olive oil, and a good source of fiber, magnesium, and zinc. A cup of pecans has about 10 grams of fiber. The topping is still mostly sugar and butter, so let’s not get carried away — but the pecans are doing real work in there.
Here’s the rough breakdown per cheesecake, based on the recipe as written:
| Nutrient | Amount per cheesecake |
|---|---|
| Calories | About 310 |
| Total fat | 22 g |
| Saturated fat | 10 g |
| Carbohydrates | 26 g |
| Sugar | 21 g |
| Protein | 4 g |
| Fiber | 1 g |
| Sodium | 145 mg |
These are estimates, not lab results. Your numbers will shift a little depending on the brands you use and how generously you spoon the topping. If you want a lighter version, you can use reduced-fat cream cheese and cut the topping to a tablespoon per cheesecake.
It won’t taste the same — full-fat cream cheese exists for a reason — but it’s a reasonable trade.
Store-Bought Crumbs or Crush Your Own?
You can buy graham cracker crumbs in a box. They’re in the baking aisle, right next to the pie crusts. They work. They’re consistent, they’re fine, and on a busy day they’re the right call.
Crushing your own crackers is better, though, and not by a little. Fresh-crushed crumbs have a coarser, more interesting texture. The crust holds together with a little more character — some fine bits, some slightly bigger ones — instead of the uniform dust that comes out of a box. The flavor is brighter too. Boxed crumbs sit on a shelf for months, and graham flavor fades with time, the same way stale crackers taste like nothing much at all.
If you’re crushing your own, count ten full graham cracker sheets. That’s about a cup and a half of crumbs. A food processor turns them into crumbs in about ten seconds. No food processor? Put the crackers in a zip-top bag, squeeze the air out, and go at them with a rolling pin. It’s loud. It’s satisfying. It takes about a minute.
The difference between the two options is small, but it’s the kind of small that adds up. A better crust makes a better cheesecake, and a better cheesecake makes people ask what you did differently. The answer is usually boring — you crushed your own crackers — but the result isn’t.
One thing worth knowing: not all graham crackers are the same. The honey-flavored ones are the standard, and they work perfectly here. Cinnamon graham crackers add a warm spice note that pairs beautifully with the pecan topping, if you can find them. Chocolate grahams turn the crust into something closer to a cookie base, which works too, especially if you’re going the chocolate-crust variation route. Whatever you use, taste a crumb before you mix the crust. If the crackers taste stale, the crust will taste stale. Fresh crackers, fresh crust.
And if you’re the kind of baker who likes a project that uses up what’s already in the pantry, the same logic applies to other recipes on this site. Our single serve protein brownie is the same idea — one serving, no waste, done in minutes. The no bake gingerbread protein balls are another pantry-friendly dessert that comes together without an oven at all. Small recipes, small mess, same payoff.
A Thanksgiving Timeline for These Cheesecakes
The hardest part of holiday baking isn’t the baking. It’s the schedule. The oven is busy. The fridge is full. Everything needs to happen at once, and there’s never enough counter space.
These cheesecakes fit into a holiday schedule better than almost any dessert I know, because every step can happen a day early. Here’s how I’d plan them around Thanksgiving dinner.
Tuesday: Buy the pecans and the cream cheese. Check the pecans — smell them. If they’re stale, buy a fresh bag. Put the cream cheese in the fridge.
Wednesday morning: Make the cheesecakes. Twenty-five minutes of work, eighteen minutes in the oven, and they’re in the fridge by lunchtime. The oven is free for the rest of the day.
Wednesday evening or Thursday morning: Make the topping. It takes five minutes. Spoon it over the cold cheesecakes, add the pecan halves, and put them back in the fridge. Done.
Thursday, dessert time: Pull them out of the fridge 20 minutes before serving. Set them on a plate. Watch them disappear.
That’s the whole plan. No oven time on the day itself. No last-minute stress. The dessert is finished before the turkey goes in.
The same timeline works for Christmas, or any party. Make them the day before, top them the morning of, serve them cold or at room temperature. The recipe was built for this.
Frequently Asked Questions
Can I make mini pecan pie cheesecakes ahead of time?
Yes, and you should. Make the cheesecake bases up to two days ahead and keep them in the fridge, untopped. Make the topping and spoon it on the day you serve them. The bases also freeze well for up to two months — thaw them overnight in the fridge and top them before serving.
Do I need a water bath for mini cheesecakes?
No. A water bath protects a large cheesecake from uneven heat and cracking, but mini cheesecakes are small enough to bake evenly at 325°F without one. The low temperature and short bake time do the same job. Skip the water bath entirely.
Why did my cheesecakes crack?
The most common reason is an oven running hotter than the dial says, or cooling the cheesecakes too fast. Bake at 325°F, check them at 17 minutes, and let them cool in the oven with the door cracked for 10 minutes before moving them to a rack. Small cracks disappear under the pecan topping anyway.
Can I use a different crust?
Yes. Chocolate wafer crumbs, crushed gingersnaps, or vanilla wafer crumbs all work. Keep the same ratio — about 1½ cups of crumbs to 6 tablespoons of melted butter — and press the crust the same way. Gingersnap crust is especially good with the pecan topping.
How do I know when the cheesecakes are done?
The edges should look set and slightly puffed. The centers should jiggle when you gently shake the pan — a soft wobble, like gelatin. If the centers still look liquid and sloshy, give them another 2 minutes. If the centers look completely firm, they’re slightly overbaked, but still fine. The jiggle test is the one to trust.
Can I make these without nuts?
The pecan topping is the point of the recipe, so a nut-free version is a different dessert. But you can make the cheesecake bases on their own and top them with something else — a spoonful of pumpkin protein muffin crumbs, a drizzle of caramel sauce, or fresh berries. If someone at the table has a nut allergy, make a few plain ones in a separate tin.
Can I use light cream cheese or low-fat sour cream?
You can, but the texture changes. Light cream cheese has more water and less fat, so the cheesecake sets softer and tastes less rich. It still works. Full-fat gives you the dense, creamy texture that makes cheesecake taste like cheesecake. If you’re going to make these once a year for the holidays, use the full-fat version.
How long do mini pecan pie cheesecakes last in the fridge?
Topped, they’ll keep for 3–4 days in an airtight container. Untopped, up to 5 days. The topping softens a little after the first day in the fridge, but it still tastes great. If you’re making them for a party, top them the same day you serve them for the best look.
Can I freeze mini pecan pie cheesecakes?
Yes — freeze the cheesecake bases without the topping for up to 2 months. Freeze them in a single layer on a tray until solid, then wrap each one in plastic wrap and store them in a freezer bag. Thaw overnight in the fridge, then add the fresh topping before serving. Don’t freeze them with the topping on. It goes sticky when it thaws.
What’s the best way to serve them?
Cold, straight from the fridge, or at room temperature after 20 minutes out of the fridge. Room temperature is slightly better — the cheesecake tastes creamier and the topping softens just enough. Peel the paper liner off before serving, or leave it on and let people peel their own. Either way works.
Conclusion
Mini pecan pie cheesecakes solve a problem that shows up every holiday season: two desserts you love, one spot on the table. They don’t ask you to choose. They don’t ask for a springform pan, a water bath, or an overnight chill. They ask for a muffin tin, a hand mixer, and about half an hour of your time.
The result is a dessert that looks like it took all afternoon. Creamy cheesecake. Buttery graham crust. A glossy pecan topping that tastes like the best part of pecan pie, spooned over the top. Twelve of them, already portioned, ready to travel, ready to make ahead.
Make them the day before the party. Top them the morning of. Set them out and watch what happens. If your family is anything like mine, the plate will be empty before the coffee’s done brewing — and someone will ask you for the recipe before they leave.