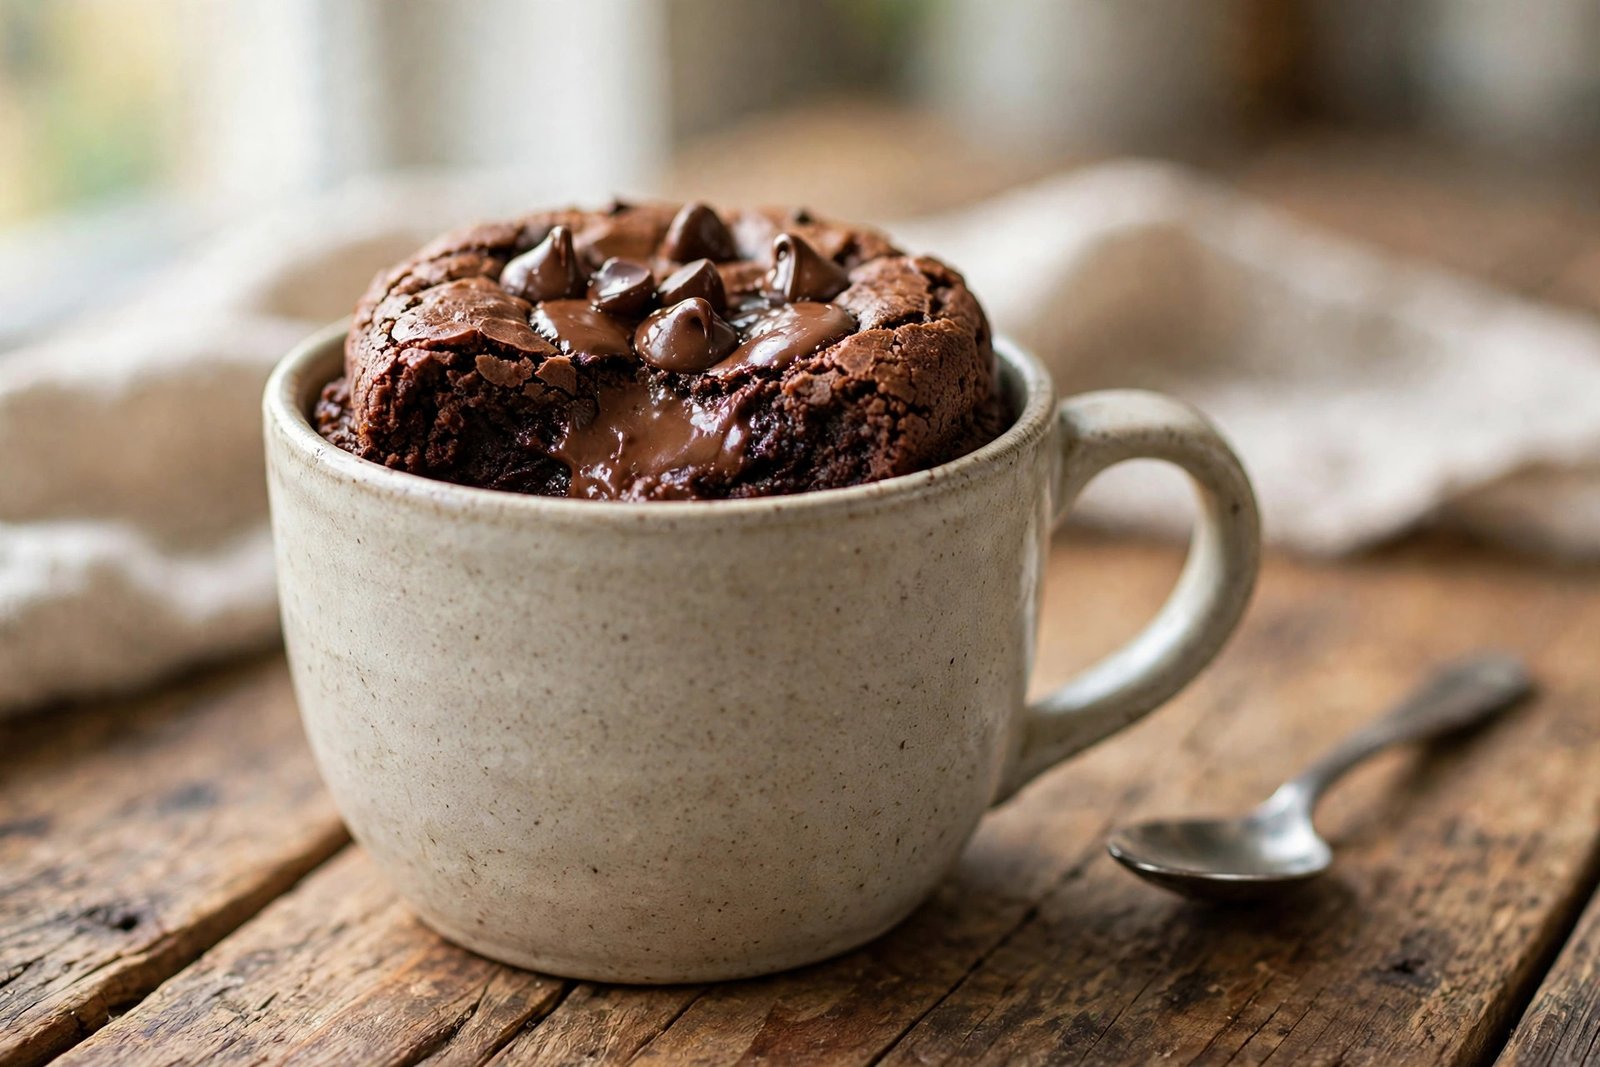
Some desserts demand a whole tray, a crowd, and a level of willpower nobody actually has at 9 pm. This one does not. A single serve protein brownie is a small, fudgy, chocolate-rich brownie made for exactly one person, in one mug or ramekin, in about ten minutes from craving to first warm bite.
It tastes like a proper brownie, not like a health food pretending to be one. The edges set, the centre stays soft and slightly gooey, and the chocolate flavour is front and centre. The difference is that it also carries a serious amount of protein — roughly 15 to 20 grams, depending on your protein powder — so it works as a post-workout treat, a filling afternoon snack, or a dessert that does not leave you hungry again half an hour later.
There is no tray to portion, no leftovers calling your name from the kitchen counter, and no need to scale a family recipe down and hope the maths works. You mix everything in the same mug you bake it in, which means the washing up is one mug and one spoon.
⚡ Quick Answer: Whisk 1 egg (or a flax egg), 2 tablespoons of milk, 1 tablespoon of melted butter or coconut oil, and 1 tablespoon of maple syrup or honey in a mug. Stir in 1 scoop of chocolate protein powder, 1 tablespoon of cocoa powder, 2 tablespoons of oat flour, 1/4 teaspoon of baking powder, and a pinch of salt until just combined. Fold in a few chocolate chips, then microwave for 60–90 seconds or bake at 175°C (350°F) for 12–14 minutes, until the edges are set and the centre is still slightly soft. Rest for 2 minutes and eat warm.
TL;DR – Recipe at a Glance
- Prep time: 5 minutes
- Cook time: 1–2 minutes (microwave) or 12–14 minutes (oven)
- Total time: About 10 minutes
- Servings: 1
- Cooking method: Microwave or oven, single mug or ramekin
- Difficulty: Easy
- Flavour: Deep chocolate, lightly sweet, warm and fudgy
- Texture: Soft, moist centre with set edges — like the middle piece of a tray brownie
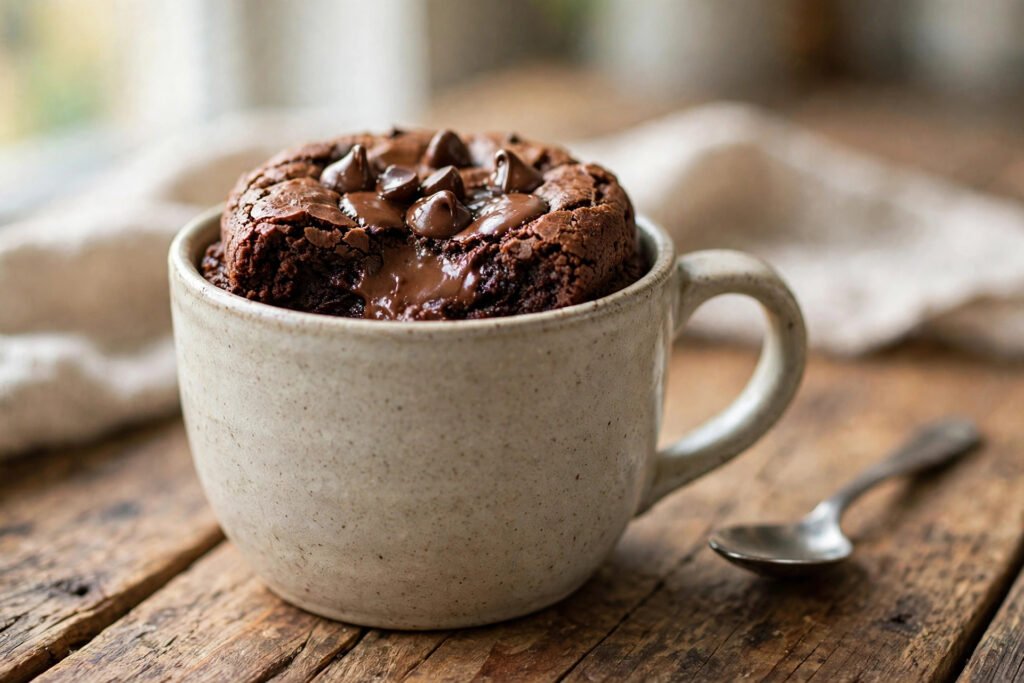
Why You’ll Love This Single Serve Protein Brownie
- One portion, no temptation: You make exactly one brownie, so there is no tray of leftovers to negotiate with later.
- Ready in about 10 minutes: Faster than a trip to the shop, and warm from your own kitchen.
- Genuinely high in protein: Around 15–20 grams per brownie, which makes it a real post-workout snack rather than just a sweet treat.
- Tastes like a real brownie: Fudgy, chocolatey, and soft — not dry, chalky, or rubbery like some protein bakes.
- One mug to wash: You mix and bake in the same mug or ramekin, so cleanup takes seconds.
- Endlessly adaptable: Swap the protein powder, change the nut butter, add peanut butter chips, or make it dairy-free — the base recipe is forgiving.
- Works for any schedule: A late-night craving, a lunchbox-style desk snack, or a quick dessert after dinner — it fits all of them.
- No special equipment: A mug, a spoon, and a microwave are enough. An oven works too if you prefer it.
What Exactly Is a Single Serve Protein Brownie?
A single serve protein brownie is a brownie batter scaled down to one portion and enriched with protein powder, so that a small dessert also functions as a protein snack. Unlike a protein bar, which is manufactured and shelf-stable, this is a fresh-baked brownie: soft, warm, and made from ingredients you can pronounce.
The idea sits at the intersection of two very practical needs. On one side, people want dessert — real dessert, with chocolate and a soft centre. On the other side, people trying to eat more protein, whether for training, for staying full between meals, or simply for balance, often find that sweet snacks are the weakest link in their day. A protein brownie answers both at once, without requiring a whole baking session.
It is also a portion-control tool that does not feel like one. Baking a full tray of brownies and promising yourself you will only eat one square is a strategy that fails most people most of the time. Baking one brownie removes the negotiation entirely. You get the full experience — warm, fudgy, chocolatey — in the exact amount you wanted.
If you enjoy single-serve desserts in general, you will recognise the same logic behind our Cottage Cheese Chocolate Mug Cake. That one leans creamy and cake-like; this brownie leans dense and fudgy. Both take about ten minutes and one mug.
Ingredients for Single Serve Protein Brownie
Everything is measured for one generous portion. If your mug is small (under 300 ml), use a slightly larger mug or a ramekin — the batter rises as it cooks, and an overfull mug will spill over in the microwave. A standard 350 ml mug is ideal.
🍫 Single Serve Protein Brownie Recipe Card
A fudgy, chocolatey, high-protein brownie for one, mixed and baked in a single mug in about ten minutes.
| Prep | Cook | Total | Servings |
|---|---|---|---|
| 5 minutes | 1–2 minutes (microwave) or 12–14 minutes (oven) | About 10 minutes | 1 |
📝 Recipe Overview
| Recipe name | Single Serve Protein Brownie |
| Prep time | 5 minutes |
| Cooking time | 1–2 minutes (microwave) or 12–14 minutes (oven) |
| Total time | About 10 minutes |
| Servings | 1 |
| Cooking method | Microwave or oven, single mug or ramekin |
| Difficulty | Easy |
| Flavor | Deep chocolate, lightly sweet, warm and fudgy |
| Texture | Soft, moist centre with set edges |
| Main allergens | Milk, egg, wheat (gluten, from oat flour if not certified gluten-free) |
🍫 Ingredients
- 1 scoop (about 25–30 g) chocolate protein powder: The main protein source and a big part of the chocolate flavour. Whey, casein, or a plant-based blend all work, but they absorb liquid differently — see the protein powder guide below.
- 1 tablespoon unsweetened cocoa powder: Gives the brownie its deep chocolate colour and flavour. Dutch-processed cocoa tastes smoother and darker; natural cocoa tastes slightly sharper. Either works.
- 2 tablespoons oat flour: Keeps the brownie soft and moist. You can blitz rolled oats in a blender for 30 seconds to make your own, or use bought oat flour. Certified gluten-free oat flour makes the recipe gluten-free.
- 1/4 teaspoon baking powder: Just enough lift to keep the brownie from turning dense and flat. Do not be tempted to add more — too much makes it taste bitter and rise then collapse.
- 1 pinch of salt: Salt does not make the brownie salty; it makes the chocolate taste more like chocolate. Do not skip it.
- 1 large egg: Binds the batter and adds richness and extra protein. For an egg-free version, use 1 tablespoon of ground flaxseed mixed with 3 tablespoons of water, rested for 5 minutes until gel-like.
- 2 tablespoons milk: Any milk works — dairy, oat, almond, or soy. It loosens the batter to the right consistency.
- 1 tablespoon melted butter or coconut oil: Fat is what makes a brownie fudgy instead of cakey. Butter gives a classic flavour; coconut oil keeps it dairy-free.
- 1 tablespoon maple syrup or honey: Sweetens the brownie gently. The protein powder is usually already sweetened, so you do not need much. Adjust to taste.
- 1/2 teaspoon vanilla extract: Rounds out the chocolate flavour and adds warmth.
- 1 tablespoon chocolate chips, plus a few extra for the top: These melt into little pockets of chocolate. Dark chocolate chips keep the sugar lower; milk chocolate chips make it sweeter.
🧰 Equipment Needed
- A microwave-safe mug (about 350 ml) or an oven-safe ramekin
- A fork or small whisk
- Measuring spoons
- A microwave, or an oven preheated to 175°C (350°F)
⭐ Ingredient Tip: The protein powder you choose changes the result more than any other ingredient. A whey isolate makes a slightly lighter brownie, a casein or plant blend makes a denser, fudgier one, and an unsweetened powder will need an extra teaspoon of maple syrup. If this is your first time making it, use a chocolate powder you already like the taste of on its own — the brownie will taste like it, only better.
Quick Recipe Instructions
- In a microwave-safe mug, whisk the egg, milk, melted butter, maple syrup, and vanilla until smooth.
- Add the protein powder, cocoa powder, oat flour, baking powder, and salt. Stir until just combined — a few small lumps are fine.
- Fold in the chocolate chips and scatter a few extra on top.
- Microwave on high for 60–90 seconds, or bake at 175°C (350°F) for 12–14 minutes, until the edges are set and the centre is still slightly soft.
- Rest for 2 minutes — the centre firms up as it cools — then eat warm, straight from the mug.
How to Make a Single Serve Protein Brownie Step by Step
Step 1: Choose Your Mug or Ramekin
Pick a mug that holds about 350 ml, or a ramekin of a similar size. This matters more than it sounds: a mug that is too small will overflow as the batter rises, and a mug that is too wide will spread the batter thin and overcook the edges before the centre sets. A straight-sided mug gives the most even result. If you are baking in the oven, use an oven-safe ramekin and grease it lightly with butter or oil so the brownie releases cleanly.
Step 2: Whisk the Wet Ingredients First
Crack the egg into the mug and whisk it with a fork until the yolk and white are fully combined. Add the milk, melted butter or coconut oil, maple syrup, and vanilla extract, and whisk again until smooth. Mixing the wet ingredients first is a small step that makes a real difference: it means the dry ingredients will only need a brief stir later, and less stirring means a more tender brownie. If your butter is very hot from melting, let it cool for a minute before adding the egg — hot butter can start to scramble the egg, and no one wants that texture in a brownie.
Step 3: Add the Dry Ingredients
Add the protein powder, cocoa powder, oat flour, baking powder, and salt directly into the mug. Stir with the fork until just combined, scraping the bottom and sides of the mug as you go. Stop as soon as you no longer see dry pockets of powder. A few small lumps are completely fine and will disappear during cooking. Overmixing is the most common reason protein bakes turn tough and rubbery, because protein powder firms up quickly when it is worked too much. Think of it like pancake batter: gentle and brief beats thorough.
⭐ Pro Tip for a Fudgier Centre: If you like your brownie extra gooey, hold back one teaspoon of the milk and stir it in right at the end, after the batter looks combined. That tiny bit of extra moisture keeps the centre soft without making the batter runny.
Step 4: Fold in the Chocolate Chips
Add most of the chocolate chips and fold them through the batter with two or three gentle strokes. Save a few chips to scatter on top — they melt into glossy pools on the surface and make the finished brownie look as good as it tastes. This is also the moment to add any mix-ins you want, such as a spoonful of peanut butter swirled through the top, a pinch of flaky sea salt, or a few chopped nuts. Keep mix-ins to a tablespoon or two; the batter is small, and too many extras will weigh it down.
Step 5: Microwave or Bake — Your Choice
For the microwave, cook on high for 60 seconds first, then check. The brownie is done when the edges look set and the centre still looks slightly wet and soft — it will firm up as it rests. If the centre still looks liquid, add 10–15 seconds at a time. Most microwaves need 60–90 seconds total, but wattages vary, so checking is better than guessing. For the oven, bake at 175°C (350°F) for 12–14 minutes. The top should look set and slightly cracked, and a toothpick pushed into the centre should come out with moist crumbs, not wet batter and not clean. A clean toothpick means it is overbaked and will be dry.
⚠️ Food Safety: The brownie contains egg, so it needs to be cooked through enough that the egg is set — the centre should be soft and fudgy, but not raw or liquid. The 2-minute rest finishes the cooking gently. If you are making the egg-free version with a flax egg, this concern does not apply in the same way, but the same resting step still improves the texture.
Step 6: Rest for Two Minutes
This is the hardest step and the easiest to skip, but it matters. Straight out of the microwave or oven, the centre is still very soft and the brownie is fragile. Two minutes of resting lets the residual heat finish setting the middle, lets the chocolate chips settle into melted pockets, and brings the temperature down to warm rather than scalding. If you eat it immediately, it will taste more like hot batter than brownie. Set a timer if you have to — those two minutes are worth it.
Step 7: Add Toppings While It Is Warm
Toppings melt and settle best while the brownie is still warm. A spoonful of Greek yoghurt, a drizzle of peanut butter, a scoop of vanilla ice cream, or a dusting of cocoa powder all work beautifully. If you are eating it as a post-workout snack, a dollop of Greek yoghurt adds even more protein and a pleasant tang against the chocolate. If it is dessert, ice cream and a drizzle of chocolate sauce turn a ten-minute mug brownie into something that feels like a restaurant dessert.
Step 8: Eat It from the Mug
There is no need to turn the brownie out onto a plate. Eating it from the mug keeps it warm longer, keeps the soft centre intact, and saves washing up. If you baked it in a ramekin and want to serve it more formally, run a knife around the edge after resting and turn it out gently onto a plate — but be aware that a warm, fudgy brownie is delicate, and it may break. Honestly, the mug is part of the charm.
Which Protein Powder Works Best?
Protein powder is not a single ingredient — it is a category, and different types behave very differently in baking. Choosing the right one is the difference between a fudgy brownie and a dry, rubbery one.
Whey concentrate is the most common choice and a good all-rounder. It mixes easily, tastes familiar, and gives a brownie that is soft with a slightly cake-like edge. Whey isolate is more refined and absorbs more liquid, so if you use isolate, add an extra tablespoon of milk to keep the batter moist. Casein is the thickest option and produces the densest, fudgiest brownie of all, because casein gels as it heats — but it can also turn heavy if you overmix, so stir it as little as possible.
Plant-based blends, usually pea and rice protein together, are the best dairy-free option. They tend to be a little grainier and absorb more liquid than whey, so add an extra tablespoon of milk and let the batter sit for a minute before cooking so the powder hydrates. Single-source pea protein on its own can taste earthy; a blend with rice protein or a flavoured chocolate version usually tastes better. Collagen powder is not a good substitute here on its own — it does not provide the same structure, and a brownie made with only collagen tends to be thin and oddly chewy. If you want collagen in your diet, add half a scoop of collagen alongside your regular protein powder rather than replacing it.
The flavour of the powder matters too. A chocolate protein powder does half the flavour work for you, which is why the recipe calls for it. Vanilla protein powder also works — the cocoa powder carries the chocolate flavour — but the result is a little less intense, so add an extra teaspoon of cocoa. An unflavoured powder needs an extra teaspoon of maple syrup and a pinch more cocoa to taste like dessert rather than a supplement.
Protein Powder Comparison
| Protein type | Texture in the brownie | Liquid adjustment | Best for |
|---|---|---|---|
| Whey concentrate | Soft, slightly cake-like | None — use as written | Everyday baking, first-timers |
| Whey isolate | Lighter, can dry out | Add 1 extra tablespoon of milk | Higher protein per scoop |
| Casein | Dense, very fudgy | None, but stir as little as possible | Maximum fudge factor |
| Plant blend (pea + rice) | Slightly grainy, hearty | Add 1 extra tablespoon of milk, rest batter 1 minute | Dairy-free baking |
| Pea protein alone | Earthy, dense | Add 1 extra tablespoon of milk | Dairy-free, if you like the taste |
| Collagen alone | Thin, chewy, poor structure | Not recommended on its own | Add half a scoop alongside another powder |
How Much Protein Is Actually in It?
With one scoop of a typical chocolate protein powder (about 20–24 grams of protein per scoop), plus the egg (about 6 grams) and the oat flour and milk (a few grams more), a single serve protein brownie made as written lands at roughly 25–30 grams of protein. If your powder is lighter, or you use a plant blend with less protein per scoop, expect 15–20 grams. Either way, it is a meaningful amount for a dessert-sized portion — comparable to a protein bar, but fresh, warm, and made from ingredients you chose yourself. The exact figure depends on your brands, so treat these numbers as honest estimates, not laboratory measurements.
Single Serve Protein Brownie vs Other Chocolate Treats
🍫 Treat Comparison
| Feature | Single Serve Protein Brownie | Regular Tray Brownie (1 piece) | Chocolate Protein Bar |
|---|---|---|---|
| Portion control | Built in — one portion only | Requires willpower | Built in |
| Protein per portion | About 15–30 g | About 2–4 g | About 15–20 g |
| Freshness | Baked fresh, warm | Fresh if just baked | Shelf-stable, never warm |
| Sugar | Low — about 1 tablespoon of sweetener | High — a tray brownie is mostly sugar and butter | Low to moderate, often sugar alcohols |
| Time to eat | About 10 minutes | 45+ minutes baking a tray | Instant |
| Texture | Soft, fudgy, warm centre | Fudgy if well made | Dense, chewy, often chalky |
| Cost per portion | Low — pantry ingredients | Low per piece, but you bake a tray | High — bars are expensive per gram |
| Customisation | Total — flavour, diet, toppings | Some, but for a whole tray | None |
Why Not Just Eat a Protein Bar?
Protein bars are convenient, and there is nothing wrong with them. But they are a compromise: manufactured for shelf life, often sweetened with sugar alcohols that upset some people’s stomachs, and priced at a premium. A mug brownie costs a fraction of a bar, takes ten minutes, tastes like actual dessert, and lets you control every ingredient — the sweetener, the protein source, the dairy or dairy-free choice, and the toppings. Bars win on portability. Brownies win on everything else.
Microwave vs Oven: Which Is Better?
The microwave is faster and gives a softer, more pudding-like centre — ideal for a late-night craving or a quick post-workout snack. The oven takes longer but gives a better texture overall: set edges, a slightly cracked top, and a centre that is fudgy rather than molten. If you have twelve minutes, the oven version is the better brownie. If you have two minutes, the microwave version is still very good, and it is the version most people will actually make on a busy day. Neither is wrong; they are just different expressions of the same recipe.
| Feature | Microwave (60–90 seconds) | Oven (12–14 minutes) |
|---|---|---|
| Total time | About 10 minutes including rest | About 20 minutes including rest |
| Centre texture | Soft, pudding-like, very gooey | Fudgy, set but moist |
| Edges | Soft all over | Slightly firmer, more brownie-like |
| Top | Smooth, chips melted in | Lightly cracked, classic brownie look |
| Best for | Speed, late-night cravings | Weekend baking, serving to someone else |
| Risk | Overcooking in seconds — check often | More forgiving, wider time window |
Tips for the Best Single Serve Protein Brownie
- Weigh your protein powder once: Scoops vary between brands. Weighing one scoop the first time tells you exactly how much you are using, and keeps the recipe consistent every time after.
- Do not overmix: Stir until just combined. Protein powder firms up fast when overworked, and overmixing is the number one cause of rubbery mug cakes and brownies.
- Undercook slightly, then rest: A brownie that looks slightly underdone in the centre is perfect after two minutes of resting. A brownie that looks fully done when it comes out will be dry by the time you eat it.
- Use a mug you know: Microwaves heat unevenly, and every mug heats differently. The first time you make this, check at 60 seconds. Once you know your mug and microwave combination, you will nail the timing every time.
- Let the batter sit for a minute with plant protein: Plant-based powders absorb liquid more slowly. A one-minute rest before cooking lets the powder hydrate and removes any grainy texture.
- Add the salt: It sounds trivial, but a pinch of salt transforms chocolate from flat to rich. Unsalted brownies taste noticeably duller.
- Warm your milk slightly: Cold milk straight from the fridge can seize melted butter into little lumps. Ten seconds in the microwave, or just using room-temperature milk, keeps the batter smooth.
- Top it while warm: Toppings like peanut butter, ice cream, or yoghurt melt and settle into the brownie far better when it is still warm from cooking.
- Double-check your cocoa: Dutch-processed and natural cocoa behave the same here, but they taste different — Dutch is darker and smoother, natural is sharper and fruitier. Use the one whose flavour you prefer.
- Keep a spare scoop in mind: If your protein powder is unflavoured or unsweetened, add an extra teaspoon of maple syrup and an extra teaspoon of cocoa. Otherwise the brownie will taste healthy in the worst way.
Common Single Serve Protein Brownie Mistakes
🛠️ Troubleshooting Guide
| Problem | Likely Cause | Solution |
|---|---|---|
| Brownie is rubbery | Overmixed, or overcooked | Stir until just combined; cook less and rest 2 minutes |
| Brownie is dry | Too much protein powder, or baked too long | Check your scoop weight; reduce cooking time by 10–15 seconds |
| Centre is still raw | Undercooked, or mug too deep | Add 10–15 seconds (microwave) or 2 minutes (oven); use a wider mug |
| Batter overflowed | Mug too small | Use a 350 ml mug or larger; fill no more than two-thirds full |
| Brownie tastes chalky | Low-quality or unflavoured powder | Use a chocolate powder you enjoy on its own; add extra cocoa and sweetener |
| Brownie is bitter | Too much cocoa, or too much baking powder | Measure carefully; do not exceed 1/4 teaspoon of baking powder |
| Brownie is bland | No salt, or weak cocoa | Add the pinch of salt; use a good-quality cocoa powder |
| Brownie is cakey, not fudgy | Too much flour, or overbaked | Keep oat flour to 2 tablespoons; undercook slightly and rest |
| Chocolate chips sank | Batter too thin | Fold chips in last and keep them near the top; a thicker batter holds them better |
| Brownie stuck to the ramekin | Ramekin not greased (oven version) | Grease lightly with butter or oil before adding the batter |
| Uneven cooking in the microwave | Microwave hot spots | Stop halfway, give the mug a quarter turn, and finish cooking |
| Grainy texture with plant protein | Powder not hydrated | Rest the batter for 1 minute before cooking; add an extra tablespoon of milk |
Why Did My Brownie Turn Out Rubbery?
Rubbery texture is the most common complaint with protein baking, and it almost always comes down to two things: overmixing and overcooking. Protein powder contains proteins that tighten and firm as they are worked and heated, much like an egg white firms when whisked. A batter stirred for a minute becomes a brownie that bounces. A batter stirred for fifteen seconds stays tender. The same applies to cooking time: protein sets faster than flour, so a mug brownie goes from perfect to rubbery in about fifteen seconds of extra microwaving. The fix is simple — stir less, cook less, and let the two-minute rest do the rest of the work.
Easy Single Serve Protein Brownie Variations
- Peanut butter swirl: Drop a tablespoon of peanut butter on top of the batter before cooking and swirl it once with a knife. The peanut butter melts into ribbons through the brownie. Almond butter or cashew butter work the same way.
- Mint chocolate: Add 1/4 teaspoon of peppermint extract with the vanilla, and use dark chocolate chips. It tastes like a thin mint in brownie form, and it is especially good in warm weather served with a little cold yoghurt.
- Salted caramel: Drizzle a teaspoon of caramel sauce over the batter before cooking and finish with a pinch of flaky sea salt. The salt-sweet combination makes the chocolate taste even richer.
- Double chocolate chunk: Use two tablespoons of chocolate chips instead of one, and chop a small square of dark chocolate into chunks to fold through. The melted chunks create pockets of liquid chocolate in the centre.
- Mocha brownie: Replace one tablespoon of the milk with a tablespoon of strong cooled coffee or a shot of espresso. Coffee does not make the brownie taste like coffee — it deepens the chocolate flavour, the same way it does in a chocolate cake.
- Raspberry chocolate: Press three or four fresh raspberries into the top of the batter before cooking. They soften into jammy pockets that cut through the richness beautifully. Frozen raspberries work too; add a minute to the oven time.
- Banana bread brownie: Mash a quarter of a ripe banana into the wet ingredients and reduce the maple syrup to two teaspoons. The banana adds natural sweetness and an even moister crumb.
- Cookies and cream: Crush one chocolate sandwich biscuit and fold half into the batter, scattering the rest on top. It adds crunch and a nostalgic flavour that works surprisingly well with protein powder.
- Dairy-free: Use a plant-based protein blend, oat or almond milk, coconut oil instead of butter, and dairy-free chocolate chips. The result is just as fudgy, and the coconut oil adds a subtle richness.
- Gluten-free: Use certified gluten-free oat flour, or replace the oat flour with almond flour. Almond flour makes a slightly denser, richer brownie — reduce the butter to two teaspoons if you use it, since almonds add their own fat.
- Lower sugar: Skip the maple syrup entirely if your protein powder is already sweetened, and use dark chocolate chips or cacao nibs instead of regular chips. The brownie will be less sweet but still properly chocolatey.
- Extra protein: Add a tablespoon of Greek yoghurt to the wet ingredients and an extra half scoop of protein powder, plus an extra tablespoon of milk to balance it. This pushes the protein toward 35 grams, though the texture becomes a little denser.
How to Make It Without a Microwave
No microwave is no problem. The oven version at 175°C (350°F) for 12–14 minutes is arguably the better brownie anyway, with set edges and a classic cracked top. If you have an air fryer, it works beautifully too: 160°C (320°F) for 8–10 minutes in a ramekin, checking from 8 minutes. The air fryer’s circulating heat gives a lovely top crust. Whichever method you use, the batter and the resting step stay exactly the same — only the cooking time and temperature change.
How to Make It Egg-Free
Replace the egg with a flax egg: stir 1 tablespoon of ground flaxseed into 3 tablespoons of water and leave it for 5 minutes until it turns gel-like, then use it exactly as you would the egg. The brownie will be slightly denser and a little less rich, but still fudgy and satisfying. A chia egg (same ratio, chia seeds instead of flax) works the same way. Commercial egg replacer also works if you follow the packet ratio for one egg. Note that the egg-free version does not have the same food-safety concern about a soft centre, so you can lean even further toward gooey if you like.
The Best Toppings for a Protein Brownie
Toppings are where a simple mug brownie becomes a dessert worth serving to someone else. The warm, soft brownie is a base that pairs with almost anything creamy, crunchy, or fruity.
- Greek yoghurt: Adds tang, creaminess, and extra protein. A spoonful on a warm brownie melts slightly at the edges and tastes like a lighter version of cream cheese frosting.
- Peanut butter or almond butter: A warm drizzle that melts into the top. The salty-sweet combination with chocolate is a classic for a reason.
- Vanilla ice cream: The hot-cold contrast is unbeatable. A small scoop on a warm brownie, with the edges starting to melt, is the closest thing to a restaurant dessert you can make in ten minutes.
- Fresh berries: Raspberries, strawberries, or a few blueberries add freshness and acidity that cut through the richness. They also make the brownie look far more impressive with almost no effort.
- Whipped cream: Light, simple, and classic. A spoonful of whipped cream with a dusting of cocoa powder on top is all the decoration this brownie needs.
- Chocolate sauce or ganache: A drizzle of warm chocolate sauce doubles down on the chocolate. Keep it to a tablespoon — the brownie is already rich.
- Crushed nuts: Toasted hazelnuts, pecans, or peanuts add crunch, which is the one texture a soft mug brownie lacks on its own.
- Flaky sea salt: A tiny pinch scattered over the top just before eating sharpens the chocolate flavour dramatically. This is the single easiest upgrade in the whole recipe.
- Caramel sauce: Warm caramel with a pinch of salt turns the brownie into a salted caramel dessert. A teaspoon is plenty.
- Banana slices and honey: Sliced banana with a light drizzle of honey makes the brownie feel like a complete dessert rather than a snack, and it pairs naturally with the chocolate.
Building a Brownie Dessert Plate
If you want to serve this to someone, turn the brownie out of the ramekin onto a small plate after resting, add a scoop of vanilla ice cream beside it, drizzle with chocolate sauce, and scatter a few raspberries and a pinch of flaky salt. The whole thing takes eleven minutes and looks like something from a café menu. The fact that it is also high in protein is a detail you can mention afterwards, once they have already decided it is delicious.
How to Store and Reheat a Single Serve Protein Brownie
A single serve brownie is designed to be eaten fresh, and it is at its best warm from the mug. But life does not always cooperate, and sometimes you want to make it ahead or save half for later. Here is how.
- Room temperature: If you have baked it in a ramekin and turned it out, it keeps in an airtight container at room temperature for up to 24 hours. The texture firms up as it cools, so reheat it before eating.
- Refrigerator: Store in an airtight container for up to 3 days. Protein brownies dry out faster than regular brownies in the fridge, so keep the container sealed and do not leave it uncovered.
- Freezer: Wrap the cooled brownie tightly in cling film, then place it in a freezer bag. It freezes well for up to 1 month. Thaw overnight in the fridge, then reheat.
- Reheating: Microwave for 15–20 seconds until just warm — no longer, or it will turn rubbery. In the oven, 5 minutes at 160°C (320°F) restores the fresh-baked texture better than the microwave, if you have the time.
- Reheat only once: Like most baked goods with egg, a brownie should only be reheated once. If you know you will not eat it all, store the uneaten portion unreheated and warm only what you need.
Can You Meal Prep Protein Brownies?
Yes, with a small adjustment. Instead of mixing one mug at a time, mix a dry batch in advance: combine the protein powder, cocoa powder, oat flour, baking powder, and salt for five or six brownies in a jar, and store it sealed in the pantry. When you want a brownie, spoon out one portion of the dry mix (about 5 tablespoons), add the wet ingredients, and cook as usual. This turns a five-minute prep into a two-minute one, and it is the easiest way to make a daily protein brownie habit actually stick. Label the jar with the per-portion wet ingredients so you do not have to look the recipe up each time.
Nutrition Notes
A single serve protein brownie made as written contains roughly 300–380 calories, depending on your protein powder, milk, and sweetener choices. The protein lands around 15–30 grams, fat around 10–14 grams (mostly from the butter or coconut oil and the egg), and carbohydrates around 20–28 grams, of which sugars are roughly 8–12 grams. These are estimates based on typical brands — your exact numbers will vary with the specific products you use, and a nutrition label on your protein powder tub is the most accurate source for your version.
Compared with a regular brownie, the protein brownie is lower in sugar and higher in protein, which is the whole point. Compared with a protein bar, it is usually lower in sugar alcohols and additives, and you know exactly what went into it. It is not a health food in the sense of a salad — it is a dessert that happens to be high in protein — and framing it honestly like that is better than pretending it is something it is not.
When Is the Best Time to Eat a Protein Brownie?
Honestly, whenever you want one. But certain moments suit it particularly well. After a workout, the combination of protein and a little carbohydrate helps recovery, and a warm brownie is a far more enjoyable reward than a cold shake. As an afternoon snack, the protein keeps you full until dinner in a way that a biscuit does not. As an evening dessert, the single portion means you get the satisfaction of chocolate without the sugar crash of a large slice of cake. And as a pre-workout snack, eaten an hour or so before training, it provides gentle energy without sitting heavily. The recipe is flexible enough that the timing is really up to you.
Protein Brownies and Training
If you train regularly, you already know that hitting a daily protein target matters more than the exact timing of any single snack. A protein brownie is useful precisely because it makes that target easier to enjoy: it turns a chore (another shake, another bar) into something you look forward to. It also pairs well with the rest of a training diet — for example, after a high-protein dinner like our One Pot Creamy Garlic Chicken Orzo, a small protein brownie finishes the meal without adding a heavy second course. And on rest days, when you still want something sweet, it gives you dessert without derailing the day.
You May Also Like
- Cottage Cheese Chocolate Mug Cake
- Hot Honey Chicken Rice Bowls
- Air Fryer Sourdough Pizza Toast
- Greek Yogurt Protein Pancake Bites
- One Pot Creamy Garlic Chicken Orzo
Frequently Asked Questions
Can I make a single serve protein brownie without protein powder?
You can, but it will no longer be a protein brownie — it becomes a regular mug brownie. Replace the scoop of protein powder with 2 extra tablespoons of oat flour and 1 extra teaspoon of cocoa powder, and keep everything else the same. The texture will be softer and more cake-like, and the protein will drop to roughly 6–8 grams from the egg and milk alone. If your goal is the protein, the powder is the ingredient that matters most.
Why is my protein brownie rubbery?
Almost always overmixing or overcooking. Stir the batter until just combined — fifteen seconds is plenty — and cook it slightly less than you think you need to, then rest it for two minutes. Protein firms up fast when it is worked or heated too much, so gentle handling is the whole secret. Also check your mug size: a very small mug concentrates the heat and overcooks the brownie quickly.
How many calories are in a single serve protein brownie?
Roughly 300–380 calories as written, depending on your brands — your protein powder, milk, and sweetener choices move the number most. The protein is roughly 15–30 grams. If you want a lighter version, use a lower-calorie milk, skip the chocolate chips, and use a light butter alternative; that typically saves 50–80 calories without changing the texture much.
Can I make this brownie dairy-free?
Yes, easily. Use a plant-based protein blend, oat or almond milk, coconut oil instead of butter, and dairy-free chocolate chips. The result is just as fudgy. Plant powders absorb more liquid, so add an extra tablespoon of milk and let the batter rest for a minute before cooking so the powder hydrates properly.
Can I make it gluten-free?
Yes. Use certified gluten-free oat flour, or swap the oat flour for almond flour. With almond flour, reduce the butter to two teaspoons, since almonds add their own fat and the brownie can otherwise turn greasy. Also check that your protein powder and chocolate chips are certified gluten-free if you are baking for someone with coeliac disease, since cross-contamination varies by brand.
Can I bake it in the oven instead of the microwave?
Absolutely, and many people prefer the oven version. Bake at 175°C (350°F) for 12–14 minutes in a greased, oven-safe ramekin. The edges set more firmly, the top cracks lightly like a classic brownie, and the centre stays fudgy. An air fryer also works: 160°C (320°F) for 8–10 minutes, checking from 8 minutes.
How long should I microwave a protein brownie?
Start with 60 seconds on high, then check. The edges should look set and the centre should still look slightly soft. Add 10–15 seconds at a time if needed. Most microwaves finish the job in 60–90 seconds total. Going straight to 2 minutes is the most common mistake — protein brownies overcook in seconds, and an extra 30 seconds is the difference between fudgy and rubbery.
Can I use vanilla protein powder instead of chocolate?
Yes. The cocoa powder carries the chocolate flavour, so a vanilla powder still produces a proper chocolate brownie — just a slightly less intense one. Add an extra teaspoon of cocoa powder to compensate, and the same amount of sweetener. The result is a little lighter in colour and milder in flavour, which some people actually prefer.
Is a protein brownie good after a workout?
It is a solid post-workout snack: roughly 15–30 grams of protein plus some carbohydrate, in a form you will actually enjoy eating. It is not a replacement for a full post-workout meal if you train hard, but as a snack within a couple of hours of training, it does the job well. Pairing it with a glass of milk or a spoonful of Greek yoghurt pushes the protein even higher.
Can I store a protein brownie for later?
Yes, but it is best fresh. At room temperature it keeps for up to 24 hours in an airtight container; in the fridge for up to 3 days; in the freezer for up to 1 month wrapped tightly. Reheat in the microwave for 15–20 seconds, or in the oven for 5 minutes at 160°C (320°F). Reheat only once, and only warm the portion you are about to eat.
What if I do not have oat flour?
You can make it in 30 seconds by blitzing rolled oats in a blender until fine. Alternatively, use plain flour (the same 2 tablespoons), though the brownie will be slightly less moist and the fibre lower. Almond flour also works — see the gluten-free note above for the butter adjustment. Avoid coconut flour as a direct swap: it absorbs far more liquid and will dry the brownie out unless you add extra milk and an extra egg yolk.
Can I double the recipe for two people?
Yes, but do not cook it as one double portion in a single mug — the centre will not cook evenly. Instead, mix a double batch of batter and divide it between two mugs, cooking them one at a time in the microwave or together in the oven. Each mug then cooks exactly as the single recipe does, and both brownies come out right.
Conclusion
A single serve protein brownie is a small recipe that solves a surprisingly common problem: wanting dessert, wanting protein, and wanting neither a tray of leftovers nor a chalky protein bar. It takes ten minutes, one mug, and ingredients most kitchens already have, and it delivers a warm, fudgy, genuinely chocolatey brownie with enough protein to count as a real snack.
Make it once exactly as written, learn how your mug and microwave behave together, and then make it yours — with peanut butter swirled through, with raspberries pressed into the top, or with a scoop of ice cream melting over it on a Friday night. That first version teaches you the timing; every version after that is just dessert.
If you enjoy quick single-serve treats, our Cottage Cheese Chocolate Mug Cake and Greek Yogurt Protein Pancake Bites follow the same ten-minute, one-portion logic — one creamy and cake-like, the other a high-protein breakfast. This brownie is the fudgy member of the family, and once you have the timing down, it is the one you will come back to most.
Sources
- USDA MyPlate — Building a healthy plate: https://www.myplate.gov/
- USDA Food Safety and Inspection Service — Safe minimum internal temperatures: https://www.fsis.usda.gov/food-safety/safe-food-handling-and-preparation/food-safety-basics/safe-temperature-chart
- Harvard T.H. Chan School of Public Health — The Nutrition Source, Protein: https://nutritionsource.hsph.harvard.edu/what-should-you-eat/protein/

2 thoughts on “Single Serve Protein Brownie”