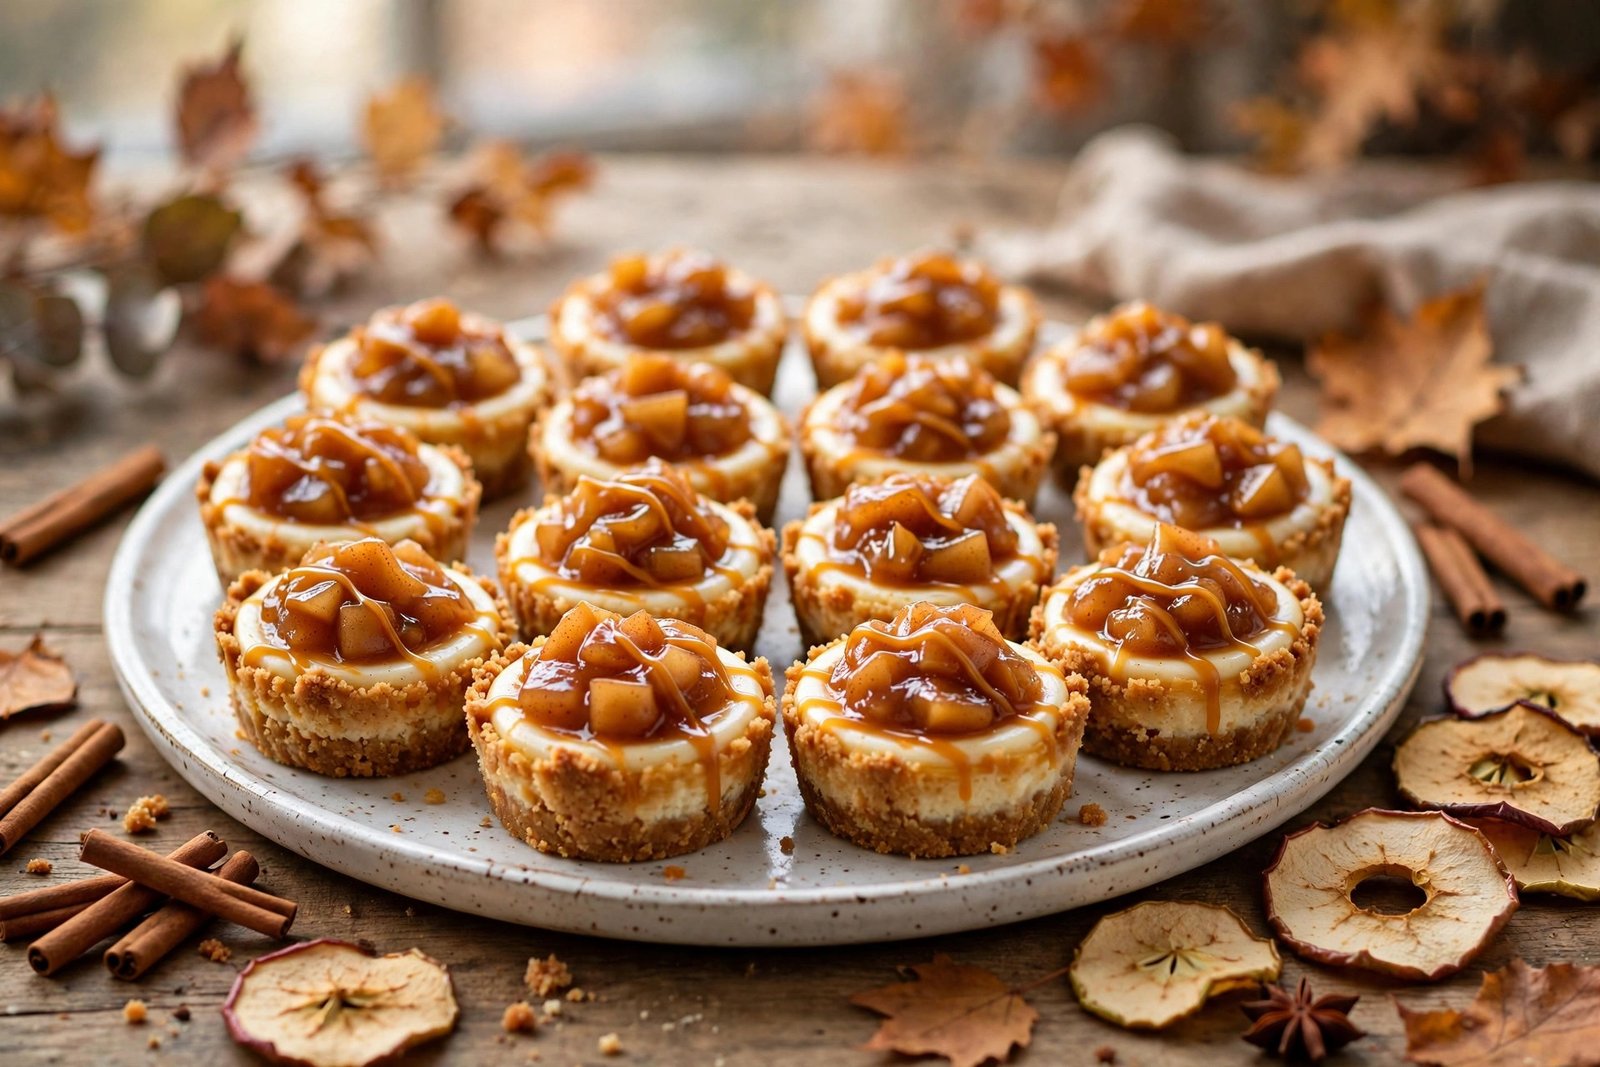
There is a specific kind of fall afternoon that this recipe was made for. The one where the light goes gold early, the kitchen smells faintly of cinnamon because somebody opened a bag of apples, and you want dessert — but not a whole project. Not a full cheesecake that needs a water bath and a prayer. Something small. Something you can pull out of a muffin tin, still a little warm, and eat standing up at the counter before it even makes it to a plate.
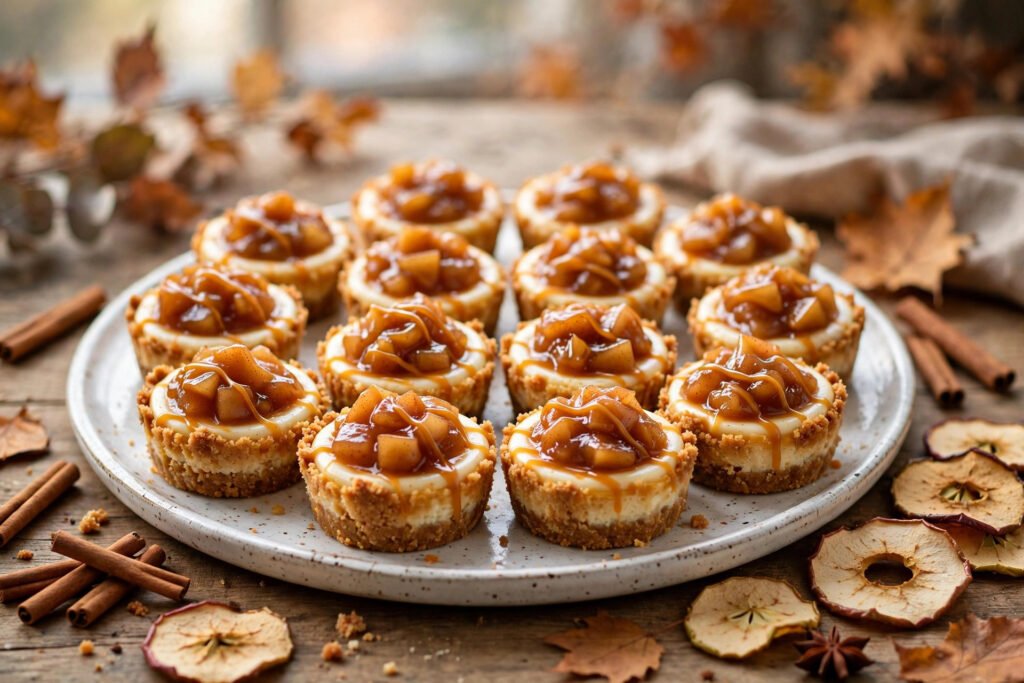
That is exactly what these mini apple cider cheesecakes are. Twelve little cheesecakes, each with its own buttery graham crust, a creamy filling that tastes like vanilla and very good cream cheese, and a spoonful of spiced apple cider topping on top — soft apple pieces cooked down in real cider until they turn glossy and smell like October. A thin drizzle of caramel if you feel like it. They take about an hour, most of which is the oven doing the work, and they look like you spent all afternoon on them.
Here is the honest part, before you start: these are not hard. Cheesecake has a reputation for being fussy, and a full-size one earns that reputation — the cracking, the sinking, the water bath. Minis dodge almost all of it. The small size means they bake fast and evenly, they cool fast, and there is no big surface to crack. If you can stir cream cheese until it is smooth, you can make these. The only real rule is room temperature ingredients, and the only real trick is not overbaking them. Everything else is just apples, butter, sugar and patience.
⚡ Quick Answer: Crush 1½ cups of graham crackers with 5 tablespoons of melted butter and 2 tablespoons of sugar, press into a lined 12-cup muffin tin, and bake 5 minutes at 165°C (325°F). Beat 450 g (16 oz) of room-temperature cream cheese with ⅔ cup sugar, 2 eggs, ¼ cup sour cream, 1 teaspoon vanilla and a pinch of salt until smooth. Fill each cup, bake 18–20 minutes until the centres barely jiggle, then cool and chill for at least 2 hours. Top with apples simmered in apple cider, cinnamon and a little brown sugar until glossy, and drizzle with caramel. The whole recipe takes about 1 hour plus chilling, and makes 12 mini cheesecakes.
TL;DR – Recipe at a Glance
- Prep time: 25 minutes
- Cook time: 25 minutes (crust + filling + topping)
- Chill time: At least 2 hours (overnight is better)
- Total time: About 1 hour, plus chilling
- Servings: 12 mini cheesecakes
- Cooking method: Baked in a standard 12-cup muffin tin at 165°C (325°F)
- Difficulty: Easy — genuinely beginner-friendly, no water bath
- Flavour: Creamy vanilla cheesecake, warm cinnamon, tart-sweet apple cider
- Texture: Buttery crumb crust, silky filling, soft glossy apple topping
- Calories: About 290 per mini cheesecake (with topping, before caramel)
- Make-ahead: Yes — they keep 4 days in the fridge and freeze beautifully
Why You’ll Love These Mini Apple Cider Cheesecakes
- No water bath, no cracking drama: The small size does the work a water bath normally does. They bake evenly, cool quickly and almost never crack.
- Real apple cider flavour, not apple flavouring: The topping is actual cider reduced with cinnamon and brown sugar, so it tastes like the orchard, not like a candle.
- Single-serve and party-ready: Twelve neat little cheesecakes, no slicing, no crumbs on the serving plate. They are the easiest dessert to hand someone at a gathering.
- Ready in about an hour: Twenty-five minutes of actual work. The oven and the fridge do the rest.
- The crust is foolproof: Graham crumbs, butter, sugar, press, bake five minutes. If you have made our Single Serve Protein Brownie, you already know how forgiving a pressed crumb base can be — this one is even simpler.
- They taste like fall without trying too hard: Cinnamon, cider, caramel, apple. Nothing exotic, nothing you have to hunt for. Every ingredient is already in a normal supermarket.
- Easy to dress up or down: Caramel drizzle and a cinnamon stick for a dinner party; plain, straight from the tin, for a Tuesday.
- Kid-friendly to make: Pressing crumbs into muffin cups is exactly the kind of job small hands love, and there is nothing hot or sharp in the filling step.
- They freeze for a month: Make a batch on Sunday, freeze half, and you have dessert ready for the next three weekends.
- Better the next day: The filling firms up and the flavours settle overnight, so making them ahead is not a compromise — it is an upgrade.
The Apple Cider Part Is the Whole Point
Let us be honest about what makes this recipe worth making. It is not the cheesecake. Cheesecake is cheesecake — good, creamy, reliable, and something you could find in a hundred recipes. What makes this one different is the topping, and the topping only works if you use real apple cider and cook it down properly.
Apple cider and apple juice are not the same thing, and the difference matters here. Cider is raw, unfiltered apple juice — cloudy, a little pulpy, with a tart edge and a depth that filtered juice does not have. Juice is clear, sweet and one-note. When you simmer cider with cinnamon and brown sugar, it reduces into something syrupy and dark and intensely apple, with a little tang left at the edges. Simmer juice the same way and you get something that tastes mostly like sugar. If your shop sells both, buy the cider. If it only sells juice, the topping still works — just add a squeeze of lemon at the end to put some of the tang back.
The other thing worth saying: you do not need a fancy cider. The kind that comes in a plastic jug in the produce section, the one that costs less than a coffee, is perfect. Save the expensive farm-stand cider for drinking. What you need is volume — a cup and a half — and about fifteen minutes of gentle simmering. The cider reduces by roughly half, the sugar and cinnamon go in, the diced apples cook until they are soft but still holding their shape, and the whole pan smells like the inside of a bakery in October.
One more practical note. A lot of recipes tell you to reduce cider to a syrup and pour it over the top like a sauce. That works, but it makes the cheesecakes wet if they sit for more than a few hours. This recipe cooks the apples in the cider instead. The apples soak up the reduced cider as it thickens, so the topping is a spoonful of glossy apple pieces, not a puddle. It sits neatly on top of eachcheesecake, it does not slide off, and it keeps for days in the fridge without turning the crust soggy. Small choice, big difference.
What These Taste Like (If You Have Never Had One)
If you have never had a mini cheesecake, the closest comparison is the middle of a really good New York cheesecake — the dense, creamy part, without the dry edges a big cake sometimes gets. The filling here is deliberately simple: cream cheese, sugar, eggs, sour cream, vanilla, salt. No flour, no cornstarch, nothing to mask the flavour. Sour cream is the quiet hero. It adds a gentle tang that keeps the filling from tasting flat and sweet, and it is the reason the texture comes out silky instead of stiff.
Then the crust. Graham crackers and butter, with just enough sugar to make the crumbs hold. It bakes into something crisp at the edges and slightly soft where it meets the filling, which is exactly the contrast you want. The cinnamon in the crust — a half teaspoon — is not an accident. It ties the crust to the topping, so the whole bite tastes like one idea instead of three separate layers that happen to be stacked.
And the topping, warm or cold, does the rest. Soft apple pieces, glossy with reduced cider, cinnamon all through it, a little brown sugar keeping the tartness in check. If you add the caramel drizzle, it brings a buttery, almost toffee note that makes the whole thing taste richer than it is. If you skip it, nobody will miss it — the cider topping is enough on its own. But the drizzle is what makes people ask for the recipe.
The Recipe Card
Here is everything you need, in one place. The sections after this card go deeper — choosing your apples, getting the filling silky, fixing the problems — but if you just want to cook, this card is the whole recipe.
| Prep time | 25 minutes |
| Cook time | 25 minutes |
| Chill time | 2 hours minimum |
| Total time | About 1 hour, plus chilling |
| Servings | 12 mini cheesecakes |
| Yield | 12 minis, about 85 g each |
| Course | Dessert |
| Cuisine | American, fall baking |
| Method | Baked in a muffin tin |
| Difficulty | Easy |
Overview
| Main ingredients | Cream cheese, graham crackers, apple cider, apples |
| Key flavour | Cinnamon, apple cider, vanilla, caramel |
| Texture | Crisp crumb crust, silky filling, soft glossy topping |
| Calories per mini | About 290 (with topping) |
| Storage | 4 days in the fridge, 1 month in the freezer |
| Make-ahead | Bake a day ahead; top just before serving |
Ingredients
For the graham crust:
- 1½ cups (150 g) graham cracker crumbs — about 10 full graham cracker sheets, finely crushed
- 5 tablespoons (70 g) unsalted butter, melted — salted butter works too; skip the extra salt in the crust if you use it
- 2 tablespoons granulated sugar
- ½ teaspoon ground cinnamon
For the cheesecake filling:
- 450 g (16 oz) full-fat cream cheese, at room temperature — two standard blocks; this is the one ingredient you cannot swap
- ⅔ cup (135 g) granulated sugar
- 2 large eggs, at room temperature
- ¼ cup (60 g) sour cream — full-fat, at room temperature
- 1 teaspoon pure vanilla extract
- ¼ teaspoon fine sea salt
- 1 tablespoon lemon juice, freshly squeezed — optional, but it brightens the filling
For the apple cider topping:
- 1½ cups (360 ml) apple cider — unfiltered if you can find it
- 2 medium apples, peeled and diced small — about 300 g; see the apple section below for varieties
- ¼ cup (50 g) light brown sugar, packed
- 1 teaspoon ground cinnamon
- ¼ teaspoon ground nutmeg
- 1 tablespoon unsalted butter
- 1 teaspoon cornstarch mixed with 1 tablespoon cold water — only if the topping needs thickening
- Pinch of salt
To serve (optional):
- Caramel sauce, for drizzling — shop-bought is fine, or homemade
- A little whipped cream
- Extra cinnamon, for dusting
Equipment
- Standard 12-cup muffin tin — the recipe is built for this size
- Paper cupcake liners — these are not optional; they are how the cheesecakes come out cleanly
- Food processor or a zip-top bag and a rolling pin — for crushing the graham crackers
- Electric mixer, hand or stand — a hand mixer is plenty
- Medium saucepan — for the cider topping
- Small glass or a spice jar — for pressing the crusts flat
- Wire rack — for cooling
Quick Instructions
- Heat the oven to 165°C (325°F). Line a 12-cup muffin tin with paper liners.
- Mix the graham crumbs, melted butter, sugar and cinnamon. Press about 1½ tablespoons into each liner and bake 5 minutes.
- Beat the cream cheese and sugar until smooth, about 2 minutes. Add the eggs one at a time, then the sour cream, vanilla, salt and lemon juice. Mix only until combined.
- Divide the filling among the cups — about 3 tablespoons each — and smooth the tops.
- Bake 18–20 minutes, until the edges are set and the centres jiggle slightly when you nudge the tin.
- Cool in the tin for 30 minutes, then chill in the fridge for at least 2 hours.
- Meanwhile, simmer the cider, apples, brown sugar, cinnamon and nutmeg for 12–15 minutes until glossy and thick. Stir in the butter.
- Spoon the cooled topping over each chilled cheesecake, drizzle with caramel, and serve.
Step-by-Step: Making Mini Apple Cider Cheesecakes
Step 1: Get the Oven and the Tin Ready
Heat the oven to 165°C (325°F) and put paper liners in all twelve cups of a standard muffin tin. Do not skip the liners. Mini cheesecakes are soft, and the liners are the only thing standing between you and twelve cheesecakes that refuse to come out of the tin in one piece. Foil liners work even better than paper — they hold their shape and peel off cleanly — but paper is fine.
While the oven heats, take the cream cheese, eggs and sour cream out of the fridge. This is the most important prep step in the whole recipe, and it costs you nothing: thirty minutes on the counter. Cold cream cheese does not beat smooth. It stays lumpy, and no amount of mixing fixes it afterwards without overbeating the filling, which is how you get cracks and a puffy, soufflé-like texture that sinks as it cools. Room temperature is not a suggestion here. It is the recipe.
Step 2: Make the Graham Crust
Crush the graham crackers into fine crumbs. A food processor does this in about twenty seconds. No food processor? Put the crackers in a zip-top bag, press out the air, and roll over them with a rolling pin or the bottom of a heavy pan until they are fine and even. A few slightly bigger pieces are fine — they give the crust a little texture — but most of it should be sand-fine, because fine crumbs pack together and hold.
Tip the crumbs into a bowl and stir in the sugar and cinnamon. Pour in the melted butter and mix until the crumbs look like damp sand and clump together when you squeeze a handful. If the mixture still looks dry and powdery, add another half tablespoon of melted butter. Different brands of graham crackers absorb butter differently, so trust your eyes over the numbers.
Divide the mixture among the twelve liners — about a heaped tablespoon and a half each — and press it down firmly. The bottom of a small glass or a spice jar is the perfect tool: press straight down, then give it a little twist to pack the edges. You want a flat, even layer about half a centimetre thick, with the crumbs pushed slightly up the sides of the liner. Press too gently and the crust crumbles when you bite it; press too hard and it turns into a brick. Firm and even is the target.
Bake the crusts for 5 minutes, just until they smell toasty and look a shade darker at the edges. They will not look fully baked — that is correct. They finish setting in the oven with the filling. Set the tin aside while you make the filling. Leave the oven on.
Step 3: Beat the Cream Cheese and Sugar
Put the room-temperature cream cheese in a large bowl and beat it on medium speed for about a minute, until it is completely smooth and spreadable, with no lumps at all. Scrape the bowl — sides and bottom — with a spatula, because lumps hide at the bottom. Add the sugar and beat for another minute or two, until the mixture is pale, creamy and completely smooth.
This is the step where patience pays. If you rush it and the cream cheese is still lumpy, those lumps will still be there in the finished cheesecake. Nobody wants a lump of plain cream cheese in the middle of a bite. Two minutes of beating now saves the whole batch.
Step 4: Add the Eggs, One at a Time
Add the first egg and beat on low speed just until it disappears into the batter — about fifteen seconds. Scrape the bowl. Add the second egg and do the same. Low speed matters here. High speed whips air into the filling, and air is the enemy of a smooth cheesecake. Air bubbles expand in the oven, puff the cheesecakes up like little soufflés, and then collapse as they cool, leaving cracks and sunken middles. You are stirring, not whipping. Think gentle.
Step 5: Finish the Filling
Add the sour cream, vanilla, salt and lemon juice (if using) and beat on low for another fifteen to twenty seconds, just until everything is combined and the batter looks silky. Scrape the bowl one last time and give it a final slow stir by hand with the spatula, folding from the bottom up. The finished batter should pour slowly off the spatula in a thick ribbon. If it still looks lumpy, beat it for another thirty seconds on low — but stop the moment it is smooth. Overmixed filling is the single most common reason mini cheesecakes crack, and you cannot undo it.
Step 6: Fill the Cups and Bake
Spoon the filling into the cups over the baked crusts, dividing it evenly — about three tablespoons per cup, or just over three-quarters full. A cookie scoop makes this fast and even. Smooth the tops lightly with the back of a spoon. Do not fill them to the brim; the filling puffs slightly as it bakes, and overfilled cups spill over the liners.
Bake for 18–20 minutes. The cheesecakes are done when the edges look set and the centres still jiggle slightly when you gently shake the tin — about the same wobble as a just-set jelly. That jiggle is not underbaking. It is exactly right. The centres finish setting as they cool, and if you wait until the centres are completely firm in the oven, they will be overbaked and dry by the time they reach the table. The tops should be pale, not browned. If the tops start to colour, your oven runs hot — turn it down 10 degrees next time.
Step 7: Cool, Then Chill
Turn the oven off and leave the tin in the oven with the door cracked open for about ten minutes. This slow cool-down is the cheapest insurance against cracks you will ever buy — a sudden temperature drop is what makes cheesecake surfaces split, and ten minutes of gentle cooling prevents most of it.
Then move the tin to a wire rack and let the cheesecakes cool to room temperature, about 30 minutes. Once they are cool, cover the tin loosely with cling film and put it in the fridge for at least 2 hours. Overnight is better, and it is what the recipe deserves: the filling firms up, the flavours settle, and the texture goes from good to the silky, dense cheesecake you were hoping for. Do not skip the chill. A warm mini cheesecake is soft, fragile and hard to unwrap — a chilled one peels out of its liner cleanly and holds its shape.
Step 8: Make the Apple Cider Topping
While the cheesecakes chill, make the topping. Put the cider, diced apples, brown sugar, cinnamon, nutmeg and a pinch of salt in a medium saucepan. Bring it to a gentle simmer over medium heat, then turn it down to low and cook for 12–15 minutes, stirring now and then, until the apples are soft but still holding their shape and the liquid has reduced to a glossy syrup that coats the back of a spoon.
You will know it is ready when the apples look translucent at the edges and the sauce clings to them instead of running off. If the sauce is still thin after fifteen minutes, stir in the cornstarch slurry and cook for one more minute — it will thicken immediately. Stir in the butter at the end; it gives the topping a shine and rounds out the flavour.
Let the topping cool to room temperature before spooning it over the cheesecakes. Hot topping on a cold cheesecake melts the surface and slides off. Spoon about a tablespoon and a half onto each cheesecake, letting a little of the syrup drip over the edges. Drizzle with caramel sauce, dust with a pinch of cinnamon if you like, and serve.
Choosing Your Apples: The Varieties That Work
The topping is only as good as the apples in it, and apples are not interchangeable. Some go soft and mushy in minutes; others stay crisp and tart and never quite cook down. The table below covers the varieties you are most likely to find in a supermarket, and what each one does in this topping.
| Apple variety | Flavour | How it cooks | Verdict for this recipe |
|---|---|---|---|
| Honeycrisp | Sweet, juicy, crisp | Holds shape well, softens slowly | Excellent — the best all-rounder |
| Granny Smith | Tart, firm, bright | Holds shape, stays pleasantly tart | Excellent — the classic baking apple |
| Braeburn | Sweet-tart, firm | Holds shape, softens evenly | Excellent |
| Fuji | Sweet, crisp | Softens a little faster, stays sweet | Very good |
| Gala | Mildly sweet, soft | Goes soft quickly | Good, but dice larger and cook less |
| Golden Delicious | Sweet, mellow | Breaks down into sauce | Good only if you like a saucier topping |
| Red Delicious | Mild, mealy | Goes mushy fast | Skip it — texture is wrong here |
| Pink Lady (Cripps Pink) | Tart-sweet, crisp | Holds shape beautifully | Excellent |
The best choice, if you can find both, is a mix: one tart apple and one sweet one. Half Granny Smith and half Honeycrisp is the combination this recipe was tested with most, and it is hard to beat — the tart apple keeps the topping bright and stops it tasting like pure sugar, and the sweet apple brings the round, mellow flavour that makes the topping taste like autumn instead of like a science experiment. If you only have one variety, use it. The topping will still be good. But if you have the choice, mix them.
One practical tip: dice the apples small, about 1 cm pieces. Big chunks take too long to soften, and by the time they are cooked the sauce has over-reduced and turned sticky. Small pieces cook in the time the cider needs to reduce, which is the whole point of cooking them together. And peel them. Apple skin goes tough and papery in a simmered topping, and it curls up into little strips that look like mistakes. A vegetable peeler takes two minutes. Use it.
The Crust: Small Details, Big Difference
The crust is three ingredients and five minutes, but it is half the eating experience — the crunch against the creamy filling is what makes a cheesecake feel like a cheesecake instead of a bowl of sweetened cream cheese. A few details are worth getting right.
First, the crumbs. Store-bought graham cracker crumbs save time and work perfectly. If you crush your own, aim for mostly fine crumbs with a few slightly larger pieces. Too coarse and the crust falls apart; too fine and it packs into something dense and hard. The butter ratio is the other half of it: five tablespoons for a cup and a half of crumbs is the sweet spot. Less butter and the crust is dry and crumbly. More butter and it turns greasy and heavy.
Second, the press. Press the crumbs into the liner firmly, but do not compact them into a solid puck. You want them packed enough to hold together when you peel the liner away, and no more. The bottom of a small glass works; the flat end of a spice jar works; your thumb works, though it is slower and less even. Whichever tool you use, press straight down and give a small twist — the twist is what packs the edges.
Third, the pre-bake. Five minutes at 165°C does two things: it toasts the crumbs so they taste like something instead of like raw cracker, and it sets the butter so the crust holds its shape under the wet filling. Skip the pre-bake and the crust stays soft and crumbly; bake it longer than five minutes and the edges start to burn before the filling even goes in. Set a timer. It is a short bake, and it is easy to forget.
If you want a different crust, the recipe is forgiving. Digestive biscuits make a slightly sweeter, more crumbly base. Gingersnaps bring a spicy warmth that suits the cider topping beautifully — use the same weight of crumbs and leave out the cinnamon, because the biscuits already have it. Oreo crumbs (filling removed) make a dark, dramatic crust that looks wonderful against the pale filling. All of them work with the same butter and sugar ratio. The graham version is the classic, but the gingersnap version might be the one you make twice.
The Filling: How to Get It Silky (and Keep It That Way)
Cheesecake filling is simple on paper — cream cheese, sugar, eggs, sour cream, vanilla — and most of the ways it goes wrong come down to two things: temperature and mixing. Both are easy to control once you know what to watch for.
Temperature first. Everything in the filling should be at room temperature before it goes in the bowl: the cream cheese, the eggs, the sour cream. Cold cream cheese does not beat smooth, cold eggs seize the batter and make it lumpy, and cold sour cream does not blend evenly. Thirty minutes on the counter is enough for the eggs and sour cream; the cream cheese needs a full thirty, or ten seconds in the microwave at low power if you forgot. Cut the blocks into cubes first — smaller pieces warm up faster.
Mixing second. The rule is low speed, short bursts, and a lot of scraping. Beat the cream cheese and sugar until smooth, add the eggs one at a time and mix only until they disappear, add the sour cream and vanilla and stop the moment it is combined. Every extra minute of beating whips in air, and air is what makes cheesecakes puff up in the oven and crack as they cool. The filling should look smooth and glossy, like thick yoghurt. If it looks fluffy or moussey, you have overbeaten it. It will still taste fine — but it will not be silky.
The sour cream deserves a word of its own, because people often ask if they can leave it out. You can, but you should not. Sour cream does two jobs: it adds a gentle tang that keeps the filling from tasting one-note sweet, and it loosens the texture so the finished cheesecake is silky instead of stiff. Greek yoghurt is the best substitute — full-fat, plain, same amount. It is a little tangier, which suits the apple topping. What does not work as a substitute is low-fat cream cheese. It has more water and less fat, and the filling comes out soft, weepy and hard to slice. Full-fat, always.
And the lemon juice — one tablespoon, optional, but worth it. You will not taste lemon in the finished cheesecake. What you will taste is a filling that is brighter and cleaner, with the sweetness sitting a little further back. It is the same trick as a pinch of salt in chocolate cake: it does not add its own flavour, it makes the other flavours louder.
Toppings: Beyond the Cider Apples
The cider apple topping is the star, but it is not the only way to finish these. The cheesecake base is a blank canvas, and the topping is where you make it yours. A few combinations that work particularly well:
Caramel drizzle. The classic. Warm the caramel sauce slightly so it pours in a thin stream, and drizzle it over the apple topping in a zigzag. Salted caramel is even better — the salt sharpens the apple and the caramel at the same time. If you are making your own caramel, a simple one is just sugar, butter and cream, and it takes ten minutes.
Whipped cream. A small dollop of softly whipped cream on top of the apples, with a dusting of cinnamon, turns these into something that looks like it came from a café. Whip the cream with a teaspoon of sugar and a drop of vanilla, and stop while it is still soft — stiff whipped cream looks neat but tastes like butter.
Streusel crumble. If you want crunch, scatter a tablespoon of oat streusel — oats, brown sugar, butter, cinnamon, baked until crisp — over the topping. It echoes the crust and adds a toasty, buttery note. Make it while the cheesecakes bake and sprinkle it on just before serving so it stays crisp.
Toasted pecans. A few chopped, toasted pecans on top of the apples add crunch and a warm, nutty flavour that suits cider. Toast them in a dry pan for two minutes, watching them constantly — pecans go from toasted to burnt in about thirty seconds.
Plain, with nothing on top. Honestly? These are good with just the apple topping and nothing else. The filling is creamy, the crust is buttery, the apples are glossy and spiced. If you are serving them to people who do not like things too sweet, skip the caramel and let the cider topping do the talking.
One thing to avoid: fresh apple slices as a garnish. They look pretty for about ten minutes, then they brown. If you want a fresh apple garnish, toss the slices in a little lemon juice first — it buys you an hour or two. The cooked topping, though, is the better garnish. It does not brown, it does not slide off, and it tastes better.
Variations: One Base, Six Different Cheesecakes
Once the plain version works, the variations are where the recipe earns its keep. Each one changes one element and leaves the rest alone, so you can try them without relearning the recipe.
Caramel apple. The version in the hero photo. Make the recipe exactly as written, then drizzle generously with caramel sauce and add a pinch of flaky sea salt on top. The salt is the difference between a sweet cheesecake and a memorable one.
Cinnamon streusel. Before baking, sprinkle a tablespoon of streusel (¼ cup flour, ¼ cup brown sugar, 2 tablespoons cold butter, ½ teaspoon cinnamon, rubbed together) over each filled cup. It bakes into a crisp, buttery lid. Top with the cider apples as usual.
Maple walnut. Replace the brown sugar in the topping with maple syrup (same amount), and stir in a handful of chopped toasted walnuts at the end. The maple brings a darker, woodier sweetness that suits the cider.
Gingersnap crust. Swap the graham crackers for gingersnap crumbs, same weight, and leave out the cinnamon in the crust. The spice in the biscuits does the work, and the darker crust looks striking against the pale filling.
Cranberry apple. Add a handful of fresh cranberries (about 60 g) to the topping pan with the apples. They burst as they cook and turn the sauce a deep ruby colour, with a tartness that balances the sweetness beautifully. This is the version to make in December.
No-bake shortcut. If you do not want to turn the oven on at all, make the crust and chill it for 30 minutes instead of baking it, and use a no-bake filling: beat the cream cheese with ⅓ cup of powdered sugar, fold in 1 cup of whipped cream, and spoon it into the crusts. Chill for 4 hours. It is lighter and softer than the baked version — more mousse than cheesecake — but it works, and the cider topping is the same.
Troubleshooting: When Mini Cheesecakes Go Wrong
Most problems with mini cheesecakes come from one of four things: cold ingredients, overmixing, overbaking, or impatience with the chill. The table below covers the failures people actually run into, and the fix for each one.
| Problem | Why it happened | How to fix it next time |
|---|---|---|
| Filling is lumpy | Cream cheese was cold | Bring cream cheese to room temperature (30 min) |
| Cheesecake cracked on top | Overmixed, or cooled too fast | Mix on low, cool slowly with the oven door cracked |
| Centre is sunken | Too much air beaten in, or overbaked | Mix gently; pull them out while the centre still jiggles |
| Crust falls apart | Not pressed firmly enough, or too little butter | Press firmly; add ½ tbsp more melted butter |
| Crust is soggy | Topping added while hot, or stored too long topped | Cool topping fully; top just before serving |
| Topping is watery | Cider did not reduce enough | Simmer longer, or add the cornstarch slurry |
| Apples are mushy | Cooked too long, or wrong variety | Use Honeycrisp or Granny Smith; cook 12 min max |
| Cheesecake tastes bland | Not enough salt or vanilla | Use the full ¼ tsp salt and real vanilla extract |
| Tops are browned | Oven runs hot | Reduce temperature by 10°C; check with a thermometer |
| Stuck to the liner | Under-chilled | Chill at least 2 hours; peel liners off cold |
| Filling is rubbery | Overbaked | Bake 18 min, not 22; the jiggle is correct |
| Topping slides off | Too much syrup, or cheesecake still warm | Use less syrup per spoonful; chill cheesecakes first |
The cracked-top problem deserves a little more attention, because it is the one people worry about most — and with minis, it is the one they worry about least needfully. A full-size cheesecake cracks because a large surface cools unevenly and contracts. A mini cheesecake has a surface the size of a coin. It cools fast, it cools evenly, and it almost never cracks. If yours did crack, it was almost certainly overmixed: too much air, puffed up in the oven, collapsed and split as it cooled. The fix is not a water bath. The fix is a slower mixer and a shorter beat.
The sunken-centre problem is the same story from the other side. A cheesecake that puffs in the oven and sinks as it cools was full of air. Next time, beat the filling on the lowest speed your mixer has, add the eggs one at a time, and stop the moment each one disappears. And pull them out while the centres still jiggle. A jiggle is a promise that the centre is still setting, not a sign of failure.
Apple Cider vs Apple Juice: What Actually Changes
It is worth spelling out the cider question properly, because it is the single most common substitution people ask about, and the answer is not just “use cider”.
| Apple cider | Apple juice | |
|---|---|---|
| Appearance | Cloudy, opaque, sometimes pulpy | Clear, golden, filtered |
| Flavour | Tart, complex, a little earthy | Sweet, clean, one-note |
| Sugar | Natural apple sugars, less sweet-tasting | Often sweeter per cup |
| Reduction | Thickens into a dark, glossy syrup | Stays thin, tastes mostly sugary |
| Best for topping | Ideal — the recipe as written | Works, with a squeeze of lemon |
| Availability | Produce section, autumn months | Everywhere, all year |
If you can only find juice, the topping still works. Add a tablespoon of lemon juice to the pan and reduce it a few minutes longer, and the result is closer to cider than you would expect. What you lose is the depth — the faint earthy, orchard quality that cider has and juice does not. What you do not lose is a good dessert.
And if you find real, unpasteurised cider at a farm stand, buy it. It reduces into something extraordinary — darker, more complex, almost wine-like in its depth. Just do not pay farm-stand prices for the whole recipe. A cup and a half is all you need, and the jug cider from the supermarket does the job beautifully.
Storage, Freezing and Making Ahead
These keep well, which is part of their charm. In the fridge, in an airtight container, they last four days. The crust softens slightly by day three — it is still good, just less crisp — so if you want the best texture, eat them within two days.
Store them untopped if you can. The apple topping keeps separately in a small container in the fridge for up to five days, and spooning it on just before serving keeps the crust crisp and the topping glossy. If they are already topped, they still keep — just cover them loosely so the topping does not get squashed.
Freezing works beautifully, and it is the best way to make these ahead. Freeze the cheesecakes without topping, in a single layer in a freezer-safe container, with a sheet of baking paper between layers if you stack them. They keep for a month. Thaw them overnight in the fridge — never at room temperature, which makes them weepy — and top them once they are fully thawed and cold. The topping itself does not freeze well; the apples go soft and the sauce thins. Make the topping fresh, which takes fifteen minutes.
To serve a crowd, make the cheesecakes the day before and the topping the morning of. That is the whole plan. Nothing about this recipe needs to be done at the last minute, and nothing about it suffers from being made ahead. If anything, it improves — the filling firms up overnight, the flavours settle, and the cheesecakes slice (or rather, unwrap) more cleanly.
How to Serve Them
Twelve mini cheesecakes feed twelve people as a dessert, or six people who are not pretending. They are rich — cream cheese, butter, sugar, caramel — so one per person is the honest serving size, and two is a statement.
For a dinner party, serve them on a platter with the caramel drizzle done at the table, a few cinnamon sticks scattered around for decoration, and a pot of coffee. They look impressive with almost no effort, which is exactly what you want from a dinner-party dessert. For a bake sale or a school event, leave off the caramel and pack them in the muffin tin itself, liners on — they travel perfectly and people can take one without a plate.
They pair well with coffee, black tea, or a glass of cold milk. With the caramel version, a sharp coffee is the best match — the bitterness cuts the sweetness and makes the apple taste brighter. With the plain version, a cup of spiced chai is almost too perfect. And if you are serving them at Thanksgiving or a harvest dinner, they sit happily next to a pumpkin pie without competing with it — different flavours, different textures, same season.
Nutrition: What Is in One Mini Cheesecake?
The numbers below are estimates, based on the recipe as written with the apple cider topping and without caramel. They come from standard USDA values for the ingredients, and they will shift a little depending on your brands.
| Per mini cheesecake | |
|---|---|
| Calories | About 290 |
| Fat | 18 g |
| Saturated fat | 10 g |
| Carbohydrates | 28 g |
| Sugar | 20 g |
| Protein | 4 g |
| Fibre | 1 g |
| Sodium | 190 mg |
Compared with a slice of full-size cheesecake — which usually runs 400 to 500 calories — a mini is a genuinely lighter portion, and it is easier to stop at one. The protein is modest, which is fair: this is a dessert, not a protein snack. If you want a high-protein sweet, our Cottage Cheese Chocolate Mug Cake is the better bet. These cheesecakes are for pleasure, and they are honest about it.
Frequently Asked Questions
Can I make mini apple cider cheesecakes ahead of time?
Yes — and you should. They are better the next day. Bake them, chill them overnight, and make the topping the morning you serve them. They keep four days in the fridge, and they freeze for a month without the topping. Making them ahead is not a compromise; it is how the recipe is meant to be done.
Do I need a water bath for mini cheesecakes?
No. That is the whole point of making them mini. A full-size cheesecake needs a water bath because a large surface cools unevenly and cracks. A mini cheesecake is small enough to cool evenly on its own. Skip the water bath, skip the foil-wrapped springform pan, and just bake them in the muffin tin.
Can I use apple juice instead of apple cider?
Yes, with one adjustment. Apple juice is sweeter and thinner than cider, so add a tablespoon of lemon juice to the topping pan and reduce it a few minutes longer. The topping will be a little less complex, but it will still be good. If you can find cider, use it — the difference is real.
Why did my cheesecakes crack?
Almost always overmixing. High speed whips air into the filling, the air expands in the oven, and the surface splits as it cools. Mix on low speed, add the eggs one at a time, and stop the moment everything is combined. Cooling them slowly — ten minutes in the oven with the door cracked — helps too.
Can I make these gluten-free?
Yes. Use gluten-free graham crackers or gluten-free digestive biscuits for the crust, same weight. The filling is naturally gluten-free. The texture of the crust will be slightly more crumbly, so press it a little more firmly and give it the full five-minute pre-bake.
How do I know when they are done baking?
The edges should look set and the centres should still jiggle slightly when you gently shake the tin — like a just-set jelly. That jiggle is correct. The centres finish setting as they cool. If you wait until the centres are completely firm in the oven, they will be overbaked and dry.
Can I freeze mini apple cider cheesecakes?
Yes, without the topping. Freeze them in a single layer in a freezer-safe container for up to a month, then thaw overnight in the fridge. Make the topping fresh when you serve them. The topping does not freeze well — the apples go soft and the sauce thins.
What is the best apple for the topping?
A mix of one tart and one sweet apple. Granny Smith plus Honeycrisp is the combination this recipe was tested with, and it is hard to beat. Braeburn and Pink Lady also hold their shape well. Avoid Red Delicious — it goes mushy — and dice the apples small, about 1 cm, so they cook in the time the cider needs to reduce.
Can I double the recipe?
Yes, easily. Double every ingredient and bake two tins, or bake one tin and then the second while the first cools. The baking time stays the same. Do not try to fit 24 into one tin — the recipe is built for twelve at a time.
Why is my topping watery?
The cider did not reduce enough. It needs a full 12–15 minutes at a gentle simmer to thicken into a syrup. If it is still thin, stir in the cornstarch slurry — a teaspoon of cornstarch mixed with a tablespoon of cold water — and cook for one more minute. It will thicken immediately. And make sure you are simmering, not boiling hard: a rolling boil evaporates the liquid too fast and leaves the apples undercooked.
Conclusion
Mini apple cider cheesecakes are the dessert equivalent of a good shortcut — not a compromise, but a smarter route to the same place. You get everything a full cheesecake promises — the creamy filling, the buttery crust, the feeling of having made something proper — without the water bath, the cracking, the waiting, or the fear. Twelve little cheesecakes, an hour of work, and a topping that tastes like the best part of autumn.
The details are small but they matter: room-temperature cream cheese, low-speed mixing, pull them out while the centres still jiggle, chill them properly, and cook the apples in the cider instead of pouring sauce over the top. Get those five things right and the recipe is almost impossible to get wrong.
Make a batch this weekend. Eat one warm from the tin — just one, before they go in the fridge — and then chill the rest and top them tomorrow. They will be better tomorrow. And the one you ate warm, standing at the counter, will be the one you remember. That is how you know a recipe is a keeper.
If you liked the single-serve idea here, try our Air Fryer Cottage Cheese Bagels next — same small-batch, no-fuss logic, completely different flavour. And if you want a dessert that is ready in five minutes flat, the Cottage Cheese Chocolate Mug Cake is still the fastest thing on this site.
Sources
- Wikipedia — Cheesecake: history and preparation of cheesecake, including baked and no-bake methods.
- Wikipedia — Apple cider: difference between cider and apple juice, production and composition.
- Wikipedia — Graham cracker: history and composition of graham crackers.
- USDA FoodData Central — nutritional values for cream cheese, graham crackers, apples and apple cider, used for the calorie and nutrition figures in this article.
- King Arthur Baking — guidance on cheesecake baking, cracking causes and cream cheese handling.

4 thoughts on “Mini Apple Cider Cheesecakes Recipe”